Deploy a service REST API
1. Deploy a service REST API
Deploying a cloud-native REST API on Axebow is easy and quick. Typically, cloud-native REST APIs are composed by: a service backend which exposes the REST API and a service database. In this guide, we’ll see how to deploy the service REST API for managing an organization employees. If you didn’t deploy the database service, it is recommended you deploy it before the REST API.
You can download the source code from this Kumori github repository, project employee-management-app.
Note this process can be used for any application in a docker image.
To start, log in Axebow using your social account, then you will be forwarded to Axebow homepage.
Go to the home page, click Run Service.
1.1. Step 1
Set the repository that contains the docker image, the name and the tag that identifies the image to deploy.
- Registry URL
-
ghcr.io - Image Name[:Tag]
-
kumori-systems/employee-service-application-backend:1.0.0

Click on Next.
1.2. Step 2
Select the Freemium Tenant. And set the CPU and memory usage limits to ensure optimal performance. Then put in the service name.
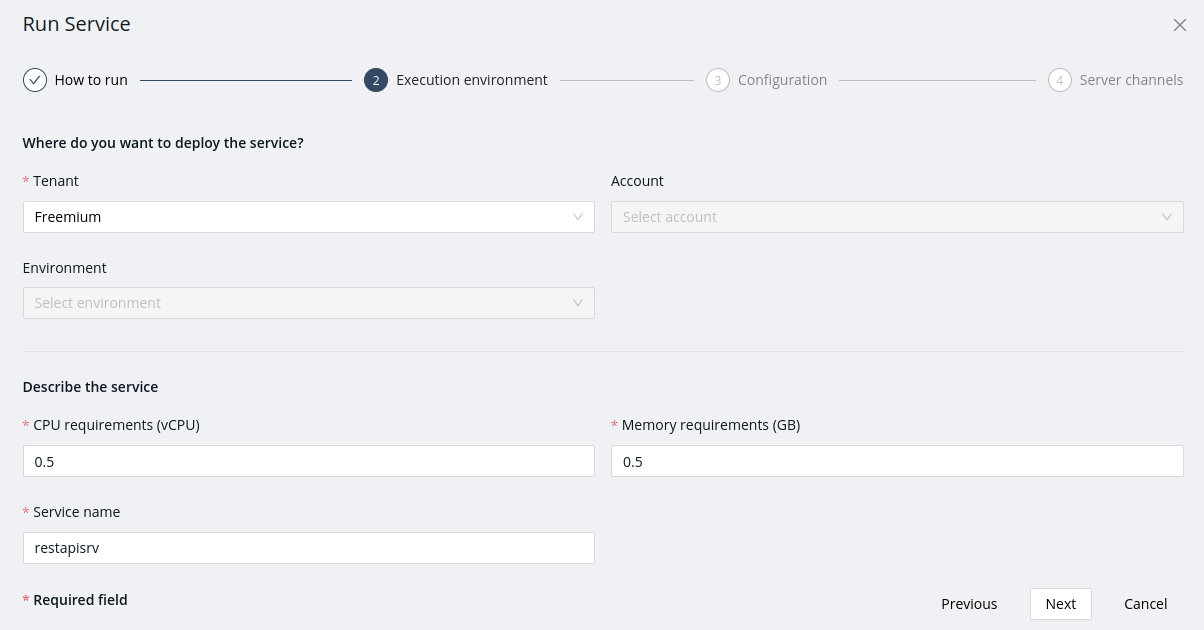
Click on Next.
1.3. Step 3
The next step is setting the configuration.
As you maybe know, by default deployed services are private what means they cannot be accessed from the Internet, only other services deployed in the same environment can connect to privete services.
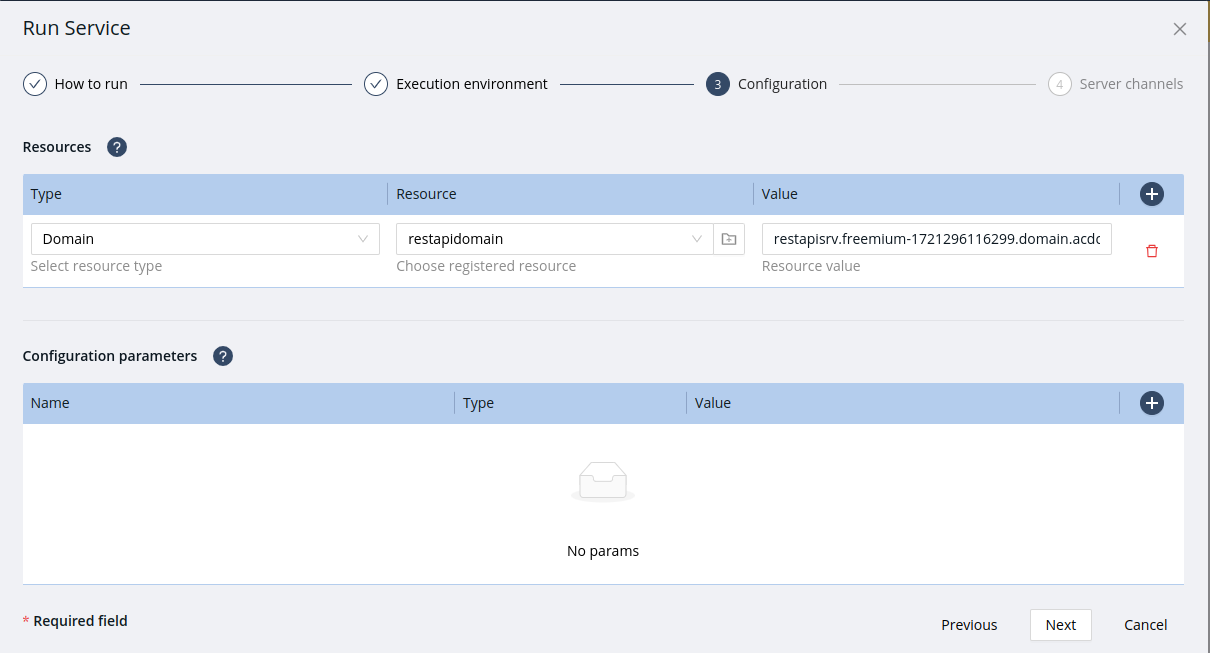
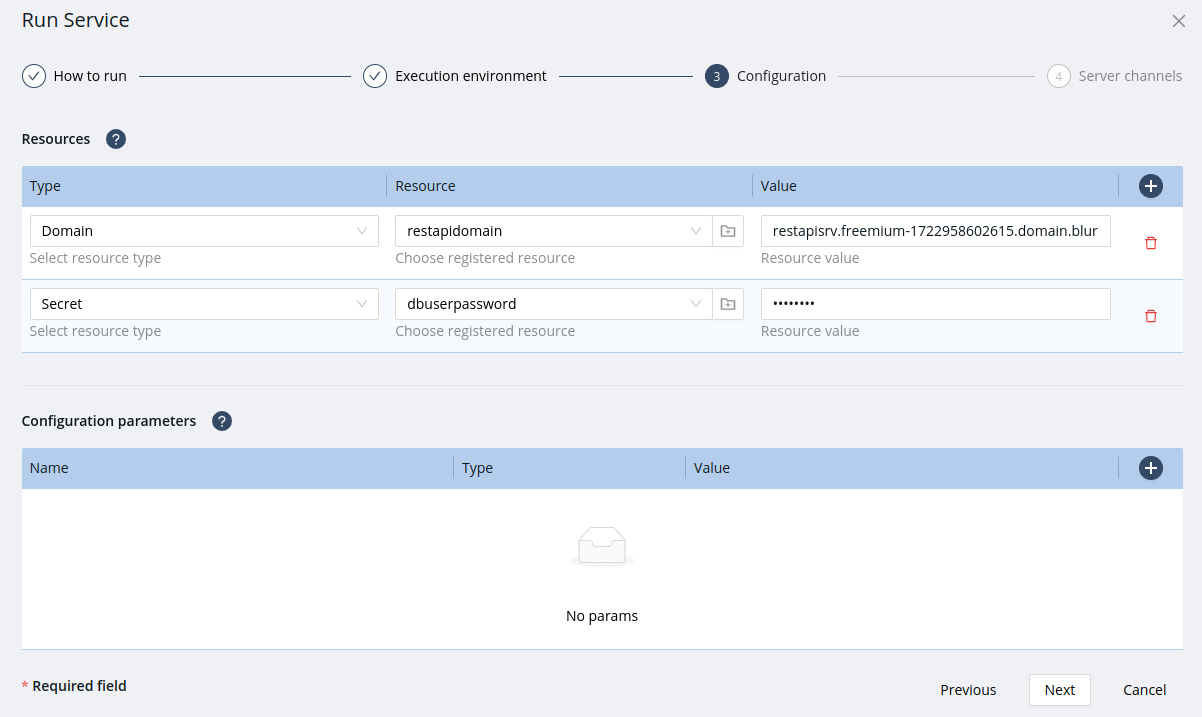
So, for example, to make HTTP requests to the REST API from your local host (using cURL o any other client), first you must register or create a resource Domain in Axebow. In the Resources section:
-
Click add new resource. Then set the resource type to Domain.
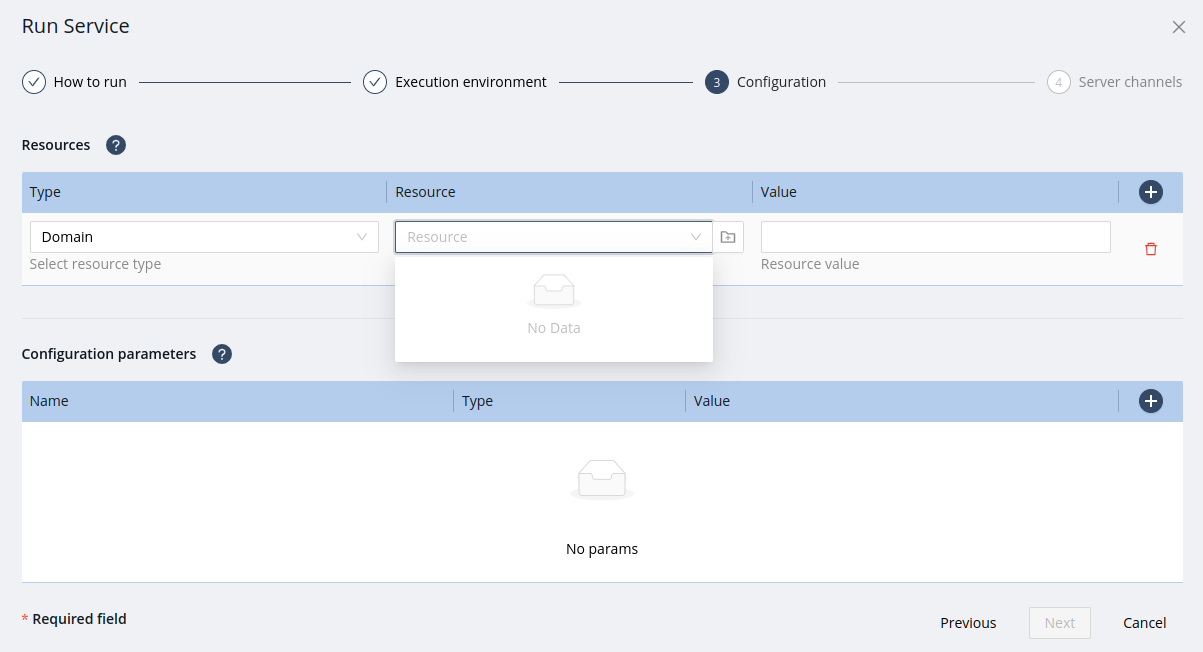
-
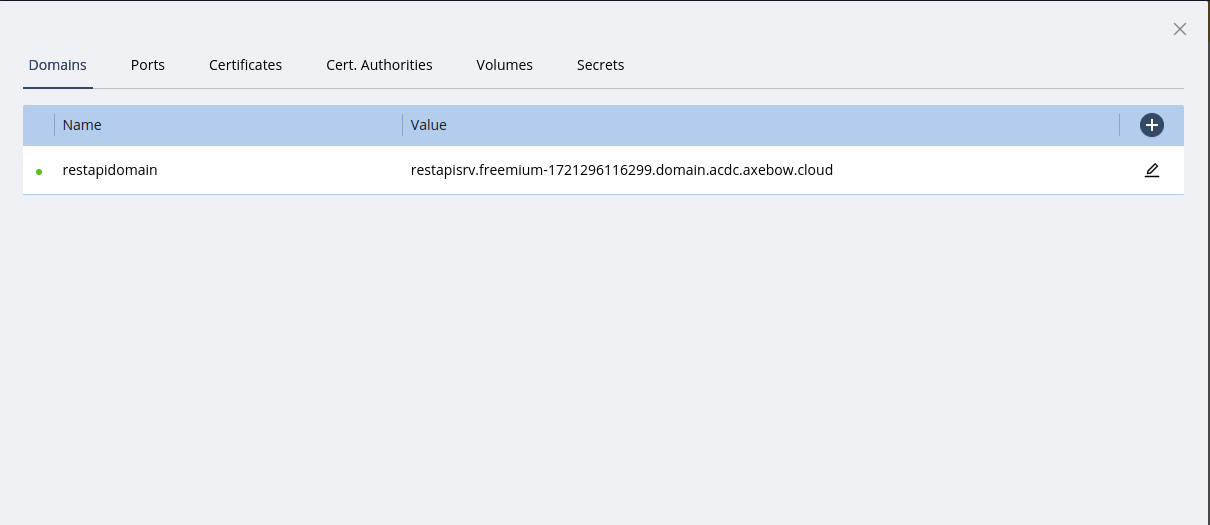
First time, there isn’t any domain and the Domain selector is empty (as you can see in the previous image), in that case click on create resource.
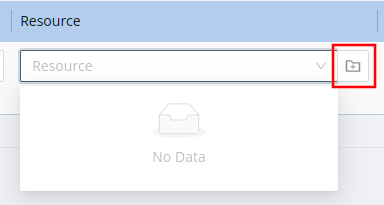
-
Click on "Register a new domain" button. Set the domain resource name that will identify the domain resource inside the tenant. Specify the subdomain name which will be created under the
axebow.clouddomain for agility.This way avoids you to manage a DNS server for adding the DNS entry for your service.
Finally click on close dialog.
-
Now, select the domain you created in the previous step. Automatically Axebow fills the domain value. Click on Next.
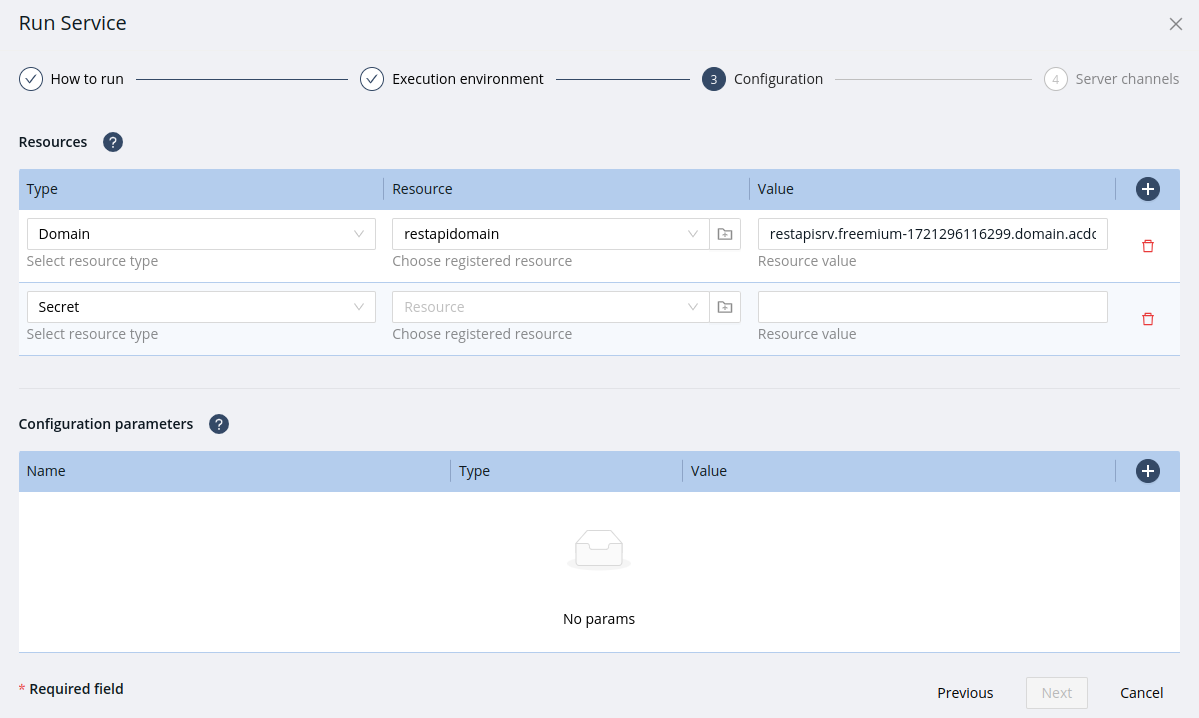
To access the database, you must set up a user. In this context, it is a best practice to create a Secret resource to store the value of the user password.
-
Click on Choose a resource button. Then set the resource type to Secret.
-
First time, there isn’t any secret and the Secret selector is empty (as you can see in the previous image), in that case click on create resource.
-
Click on "Register a new secret" button. Set the secret resource name (
dbuserpassword) that will identify the secret resource inside the tenant. Set the database user password as secret value (12341234). Click on close dialog.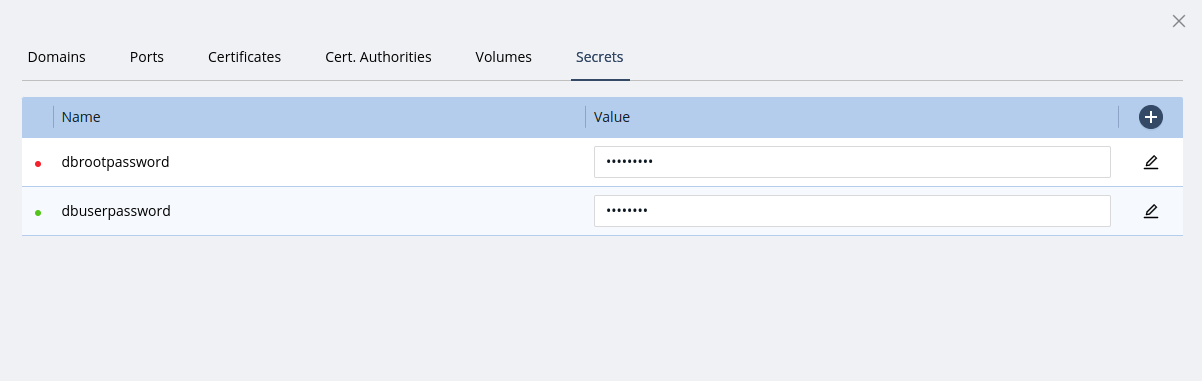
-
Select the secret you created in the previous step.
Now, in the Configuration parameters section, create the environment variables the REST API needs. As said, inspect the Dockerfile to know the database variables any container needs.
For each environment variable, click on New configuration param button. Set the environment variable name. Select the environment variable type. Then, set the environment variable value.
To deploy the REST API service of this example, create the following environment variables:
- DB_HOST
-
Type: String; Value:
0.dbchannelThe database host name must be the client channel name, you’re going to create in the next step, prefixed with the channel version (up to the date of writing, only version 0 is supported). The REST API will find and connect to the database service endpoint through this client channel. Read service discovery and client channels to learn more about this feature.
- DB_PORT
-
Type: String; Value:
80Port value must be
80, internally the REST API process will connect to port 80 of the client channel. The client channel acts as a proxy that will connect to the right server port, so no worries about the target database port, you will connect to the database port later, when you link the REST API microservice to the database microservice. - DB_NAME
-
Type: String; Value:
employee-and-department - DB_USER
-
Type: String; Value:
db-user - DB_PASSWORD
-
Type: Secret; Value:
dbuserpassword(password value12341234was set at secret registering time)
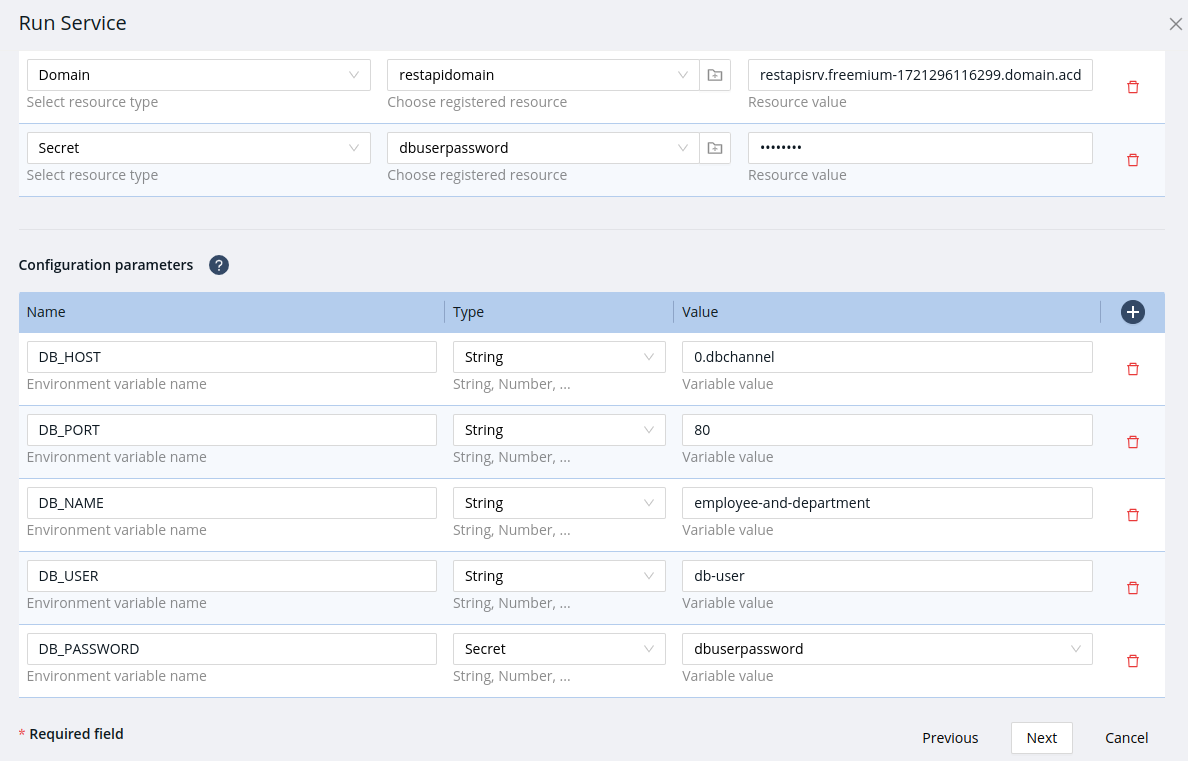
Click on Next.
1.4. Step 4
To allow incoming connections to the service, add a Server Channel. Set the channel name. Check your application dockerfile and set the port the container exposes (in this example the dockerfile exposes the port 3000).
Enable public access from the internet. Click on Public and select the domain you registered in the Step 3.
Finally, create the database client channel dbchannel to connect the REST API service to the database service.
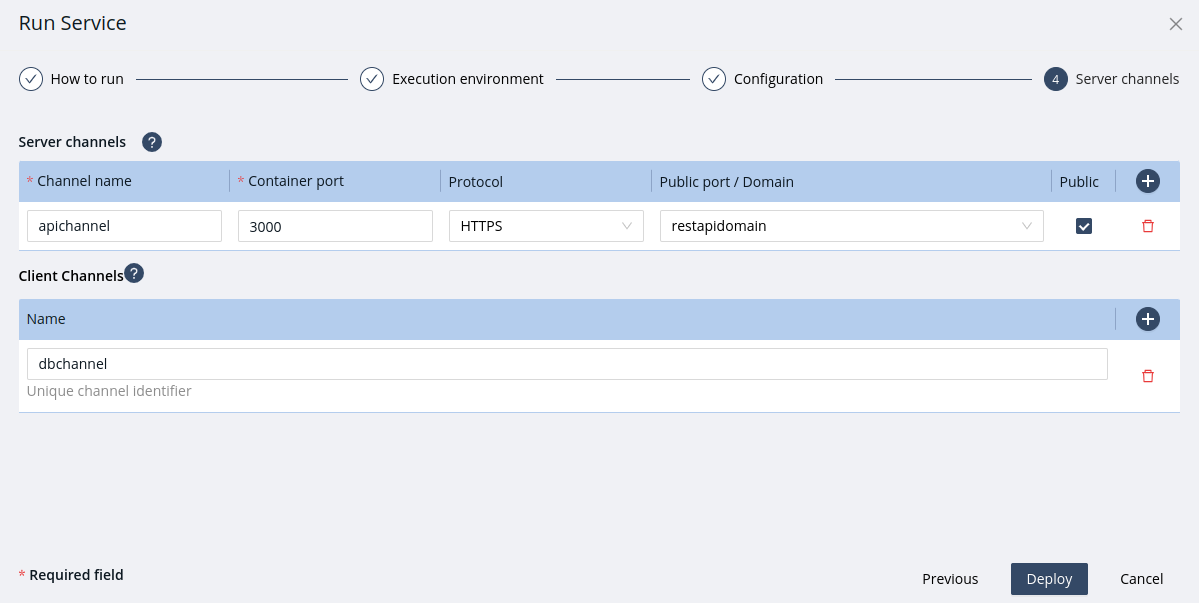
Click Deploy. This process will take a few minutes.
On the Runtime Dashboard you will see the status of the deployment process.
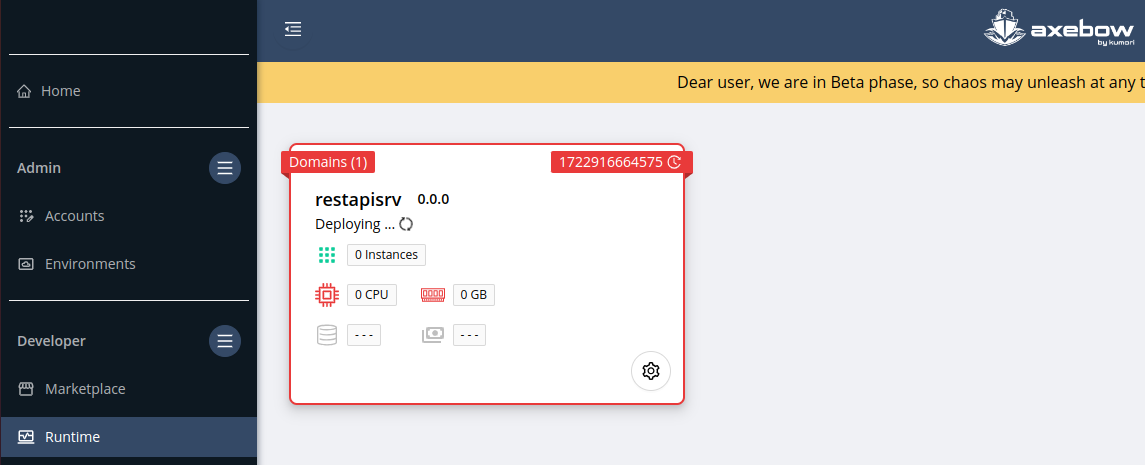
After the deployment is complete, the database service card becomes green.
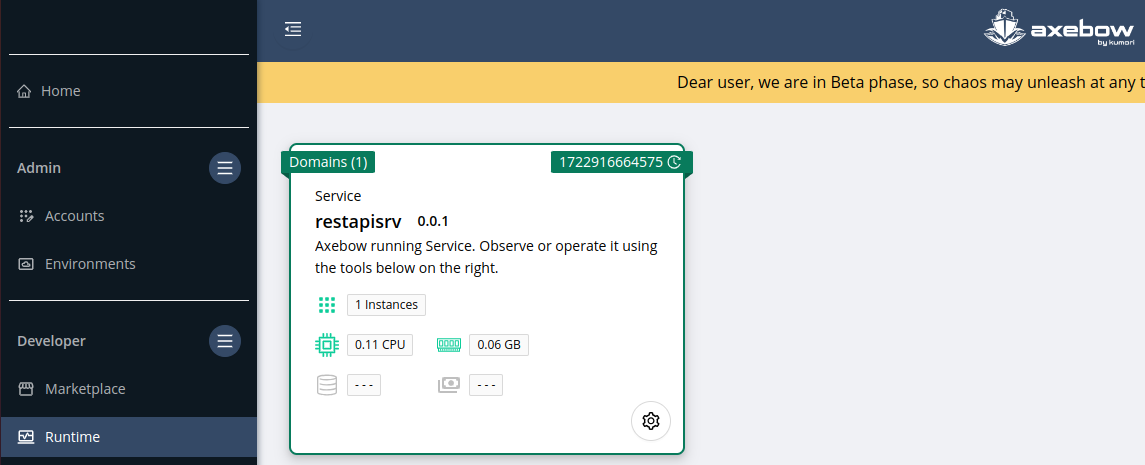
Congratulations, you successfully deployed a REST API on Axebow in just a few minutes.
Finally, connect the REST API service to a database service.
- IMPORTANT
-
You must connect the REST API to a MongoDB otherwise the REST API service will fail and it will restart automatically until it connects to a database sucessfully. Read how to deploy a database guide to deploy a MongoDB quickly.
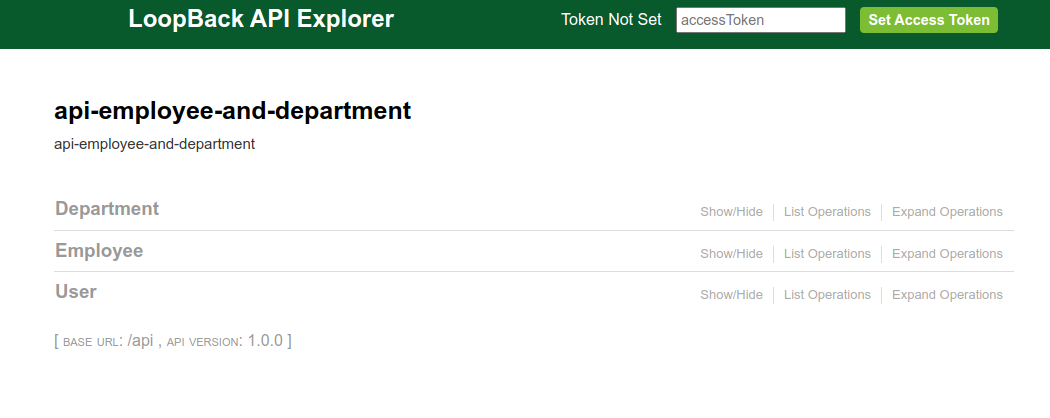
After connecting the REST API to a database, check the API is working and connected to the database, by copying the domain name in the domains list (up on the left in the REST API card) to navigate the REST API documentation at [DOMAIN]/explorer