OVH Credentials
1. Generate OVH Credentials
-
Connect to OVHcloud web site (horizon.cloud.ovh.net)
INFO: If you don’t know your user and passoword, ask your OVH Customer Success Manager to access horizon.cloud.ovh.net.
-
On the OVHcloud web site (horizon.cloud.ovh.net), on the left sidebar, press on Identity menu group and press "Application Credentials".
-
Click on "+ Create Application Credential".
Fill the user name information and select all Roles.
Click on "Create Application Credential". Then click on "Download clouds.yaml".
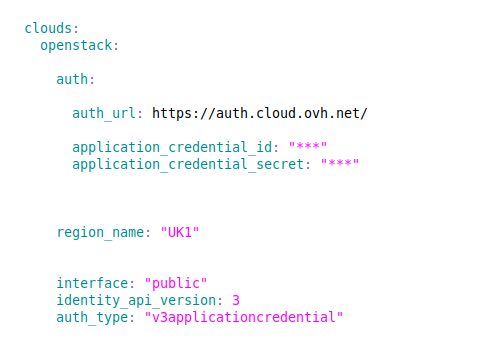
The clouds.yaml file contains the credentials you must give us in the form below.
clouds.yaml example:
2. Set OVH Account Credentials
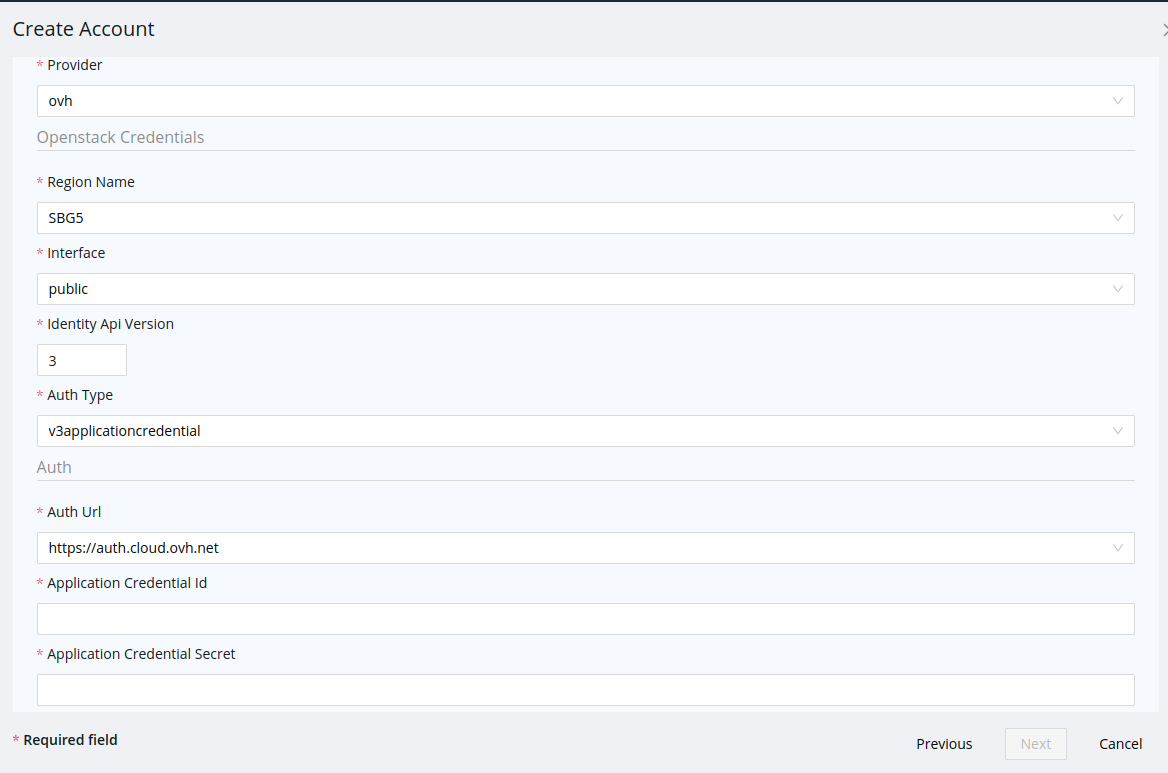
Fill the OVH Account Credentials form as follows:
-
Region Name. Select one of the values in the selection list, ignoring the
clouds.openstack.region_nameproperty in clouds.yaml file. -
Interface. Select the value in
clouds.openstack.interfaceproperty in clouds.yaml file. -
Identity Api Version. Set the value given vy
clouds.openstack.identity_api_versionproperty in clouds.yaml file. -
Auth Type. Select the value in
clouds.openstack.auth.auth_typeproperty in clouds.yaml file. -
Auth Url. Select the value in
clouds.openstack.auth.auth_urlproperty in clouds.yaml file. -
Application Credential Id. Set the value in
clouds.openstack.auth.application_credential_idproperty in clouds.yaml file. -
Application Credential Secret. Set the value in
clouds.openstack.auth.application_credential_secretproperty in clouds.yaml file.