The Web Interface
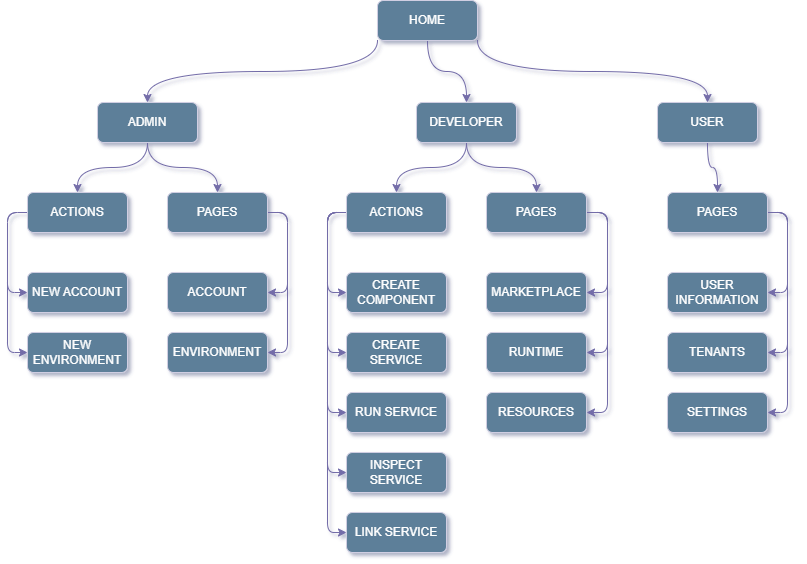
1. Sitemap
The following graphic presents the axebow.cloud sitemap, which shows the hierarchical structure and organization of the different pages and sections. This diagram is essential to understand how the different parts of the site are interconnected, facilitating user navigation.
2. Home page
People absolutely judge a book by its cover. And the cover of Axebow is the homepage.
Axebow homepage is about helping our users solve their problems. Below how Axebow homepage looks:
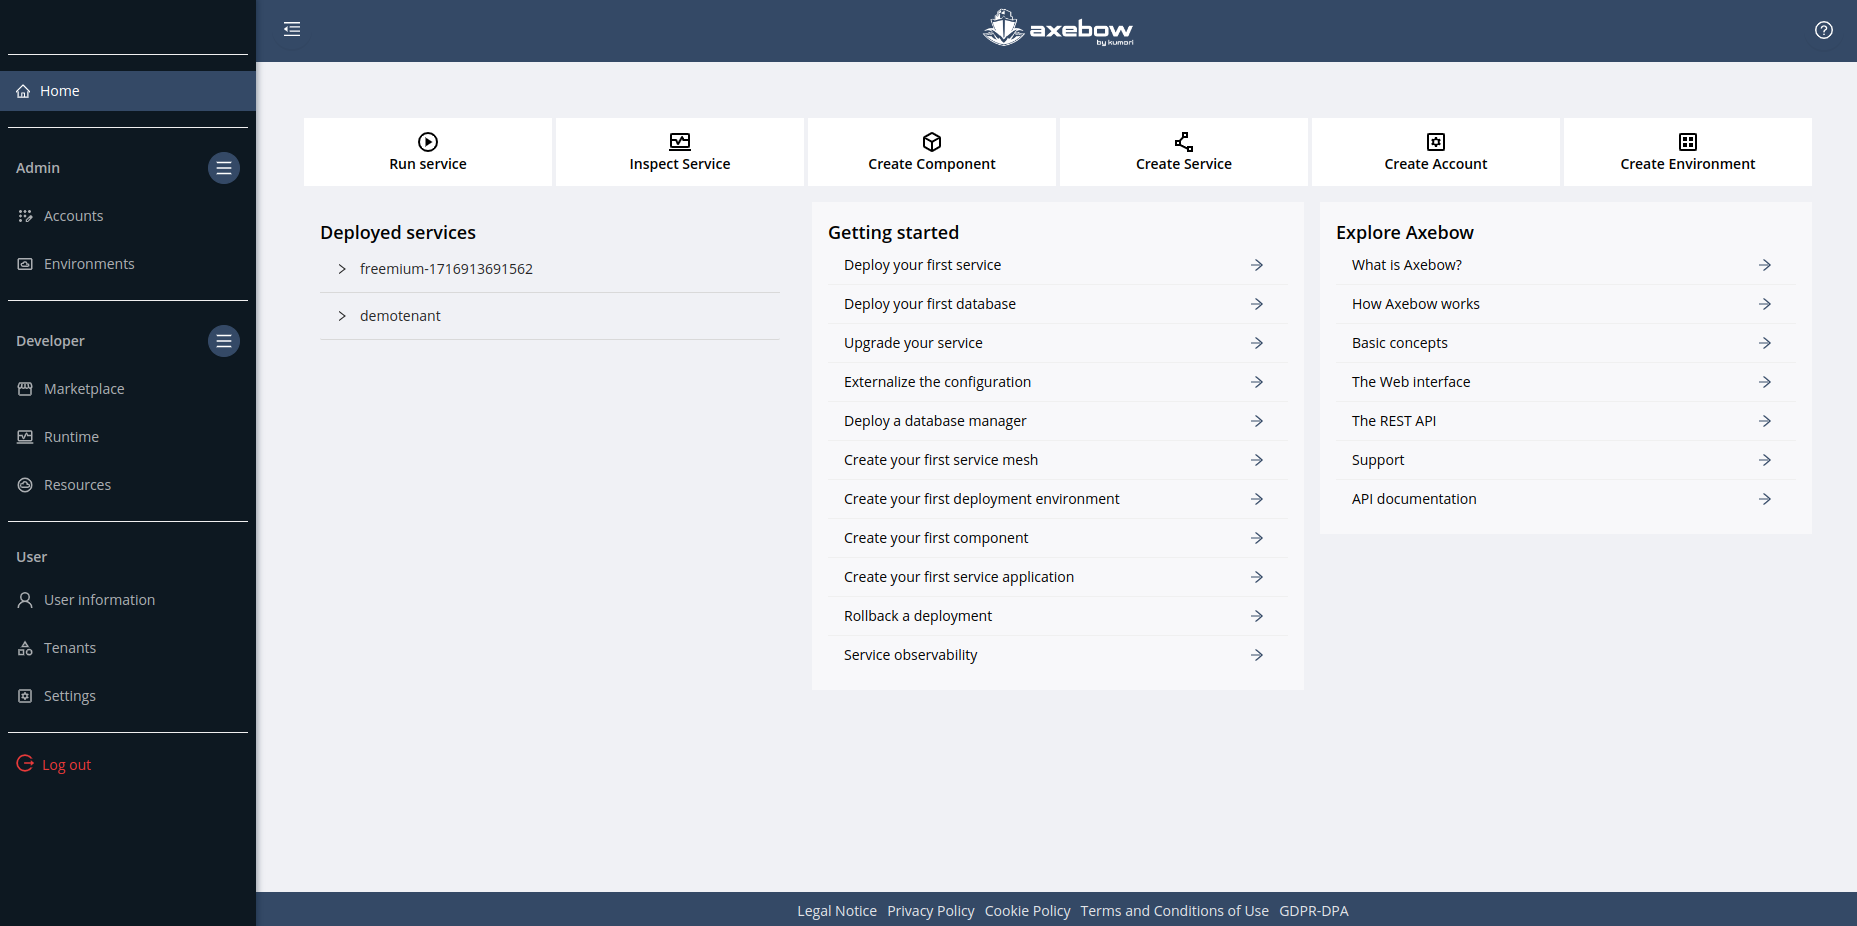
The home page is composed by several sections:
-
Quick Actions
-
Deployed Service
-
How to guides
-
Getting Started
-
Common Elements
2.1. Quick Actions
On the top, there are the most common actions that can be performed on the Axebow platform. Each of these actions will be explained later in this document.

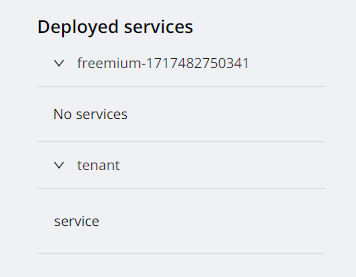
2.2. Deployed Services
In the central area, on the left, all the tenants to which the user has permissions to access, or tenants that the user has created, are shown. If you open the drop-down menu you will see each service displayed in the tenant, if there is none, "No services" is displayed. If you click on the name of the service you will navigate to the monitoring page of that service.
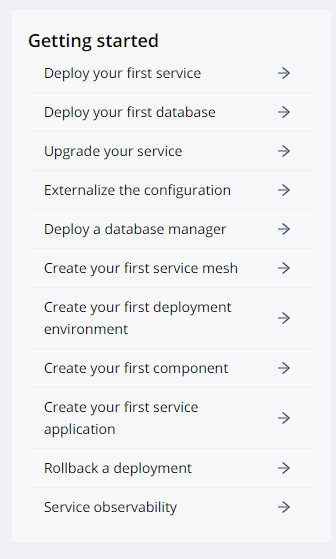
2.3. How to Guides
In the center you can see a set of quick guides on how to perform the most common use cases, such as deploying a service. Clicking on the arrow will open the corresponding documentation page.
2.4. Getting Started
Finally, on the right hand side, the general description of the platform is shown. Press the arrow to go to the specific documentation of the platform.
2.5. Common Elements
2.5.1. The menu
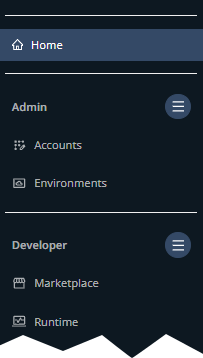
In the page left, there is the platform menu that gives access to the home, to each of the main areas: Admin, Developer, User, in the first 2 there is a submenu where the specific area functions are shown, each of which will be explained below-
It is possible that the Admin section does not appear if it is the first time or if you do not have a tenant with the owner role. After creatin a tenant as explained in the User section, the Admin menu will appear.
2.5.2. Topbar and Help
At the top of all pages there is a button on the left to close or open the menu, in the center the logo which if clicked will take you to the home page and finally on the right a help icon (?) which if clicked will display a dialog with an index of information about what can be done on the platform and a search engine to easily filter the contents of this index.

2.5.3. Privacy and Terms
At the bottom of each page there are 5 links that allow to read the policy, terms of use and other information. Click on the corresponding link to read the desired information.

3. Admin
The Admin Dashboard allows the operators to monitor and manage the cloud infrastructures easily and homogeneously, showing Accounts or Environments information and quick actions.
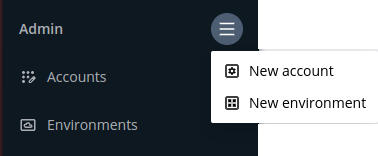
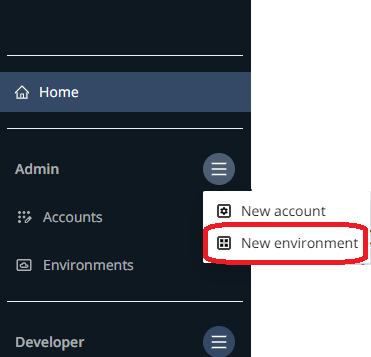
The image below shows the Admin menu from which the user can navigate to the "Accounts" Dashboard, the "Environments" Dashboard and execute the quick actions which are located in the submenu: "New account" and "New environment".
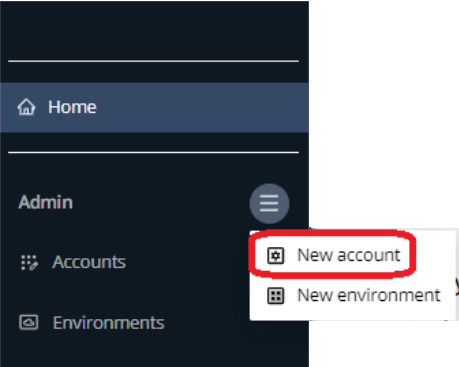
3.1. New account
To create a new Account, from the Admin submenu, click on the "New account" option.
The Account creation form will guide you step by step through the creation process.
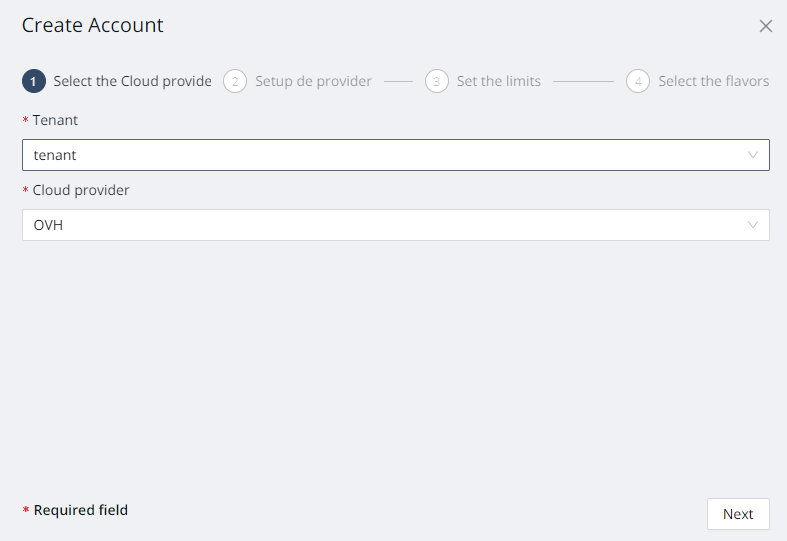
3.1.1. Step 1. Select the Cloud provider
Select the tenant where an account is to be created and the cloud provider (OVH, GCP, AWS, etc.)
3.1.2. Step 2. Setup the provider
First you must specify an Account name that will be your unique identifier. Currently the name can only contain lowercase letters.
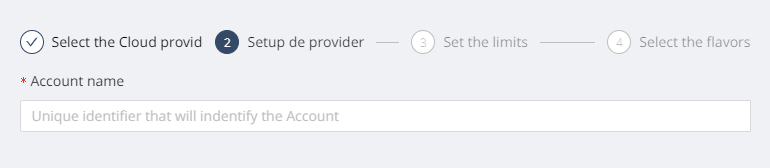
Then you must fill in the credentials that give access to the cloud provider selected in the previous step. Some data are already preset but can still be modified.
Maybe you need help to understand the value it is espected to fill in each field, if it is the case, read the cloud provider credentials guide you need:
| Integrated with | Coming soon | ||
|---|---|---|---|
GCP |
Azure |
||
3.1.3. Step 3. Set the limits
The maximum amounts of computational resources that, in total, can be used by the different applications deployed in the environments created in the account shall be indicated. CPU and memory limits are mandatory.
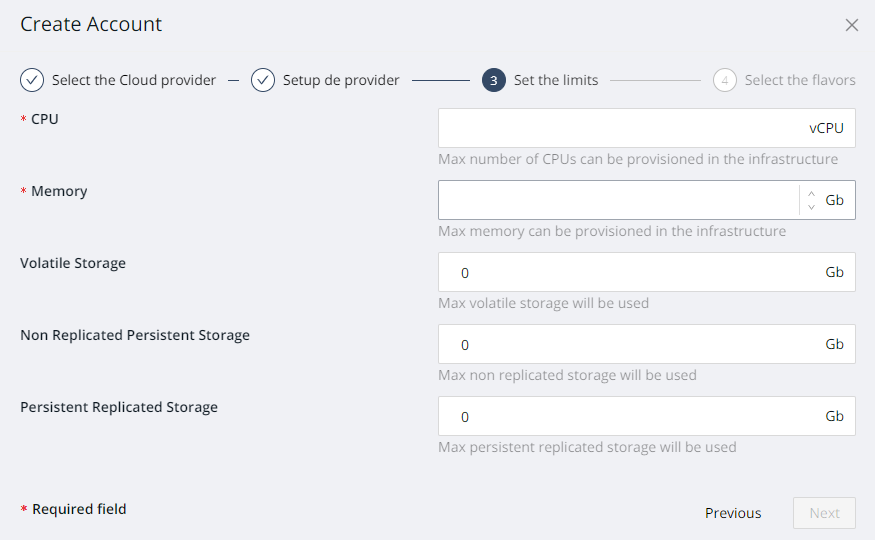
In the case of not specifying storage limits, the applications will use volatile storage.
3.1.4. Step 4. Select the flavors
Choose the types of machines to be provisioned in the cloud provider, to create the different Account deployment environments. It is advisable to select a flavor type for each type of load.
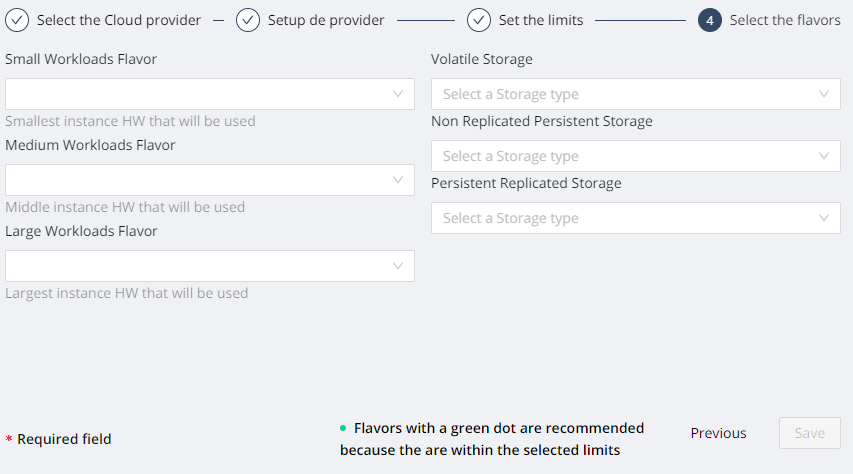
If storage limits were specified, it will also be necessary to indicate the storage flavor.
3.2. New environment
To create a new deployment environment, open the Admin submenu, click on the "New environment" option.
The Environment creation form will guide you step by step through the creation process.
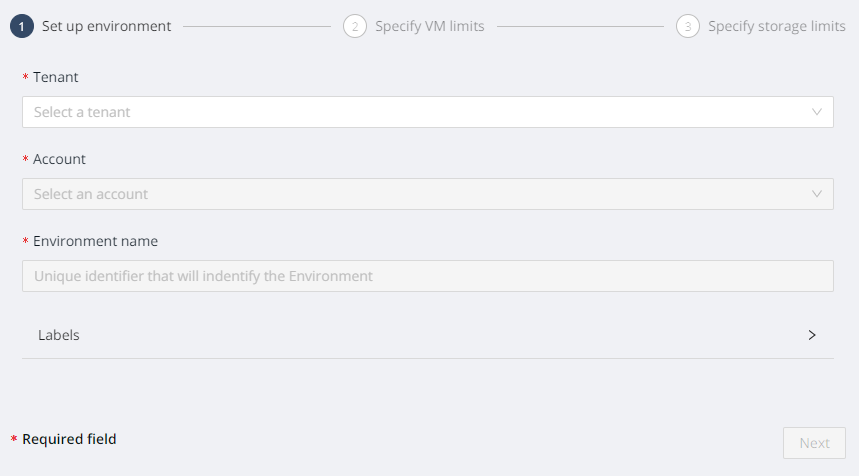
3.2.1. Step 1. Setup environment
Select the tenant and the account in which we want to create the environment. Write a unique name, with lowercase letters only.
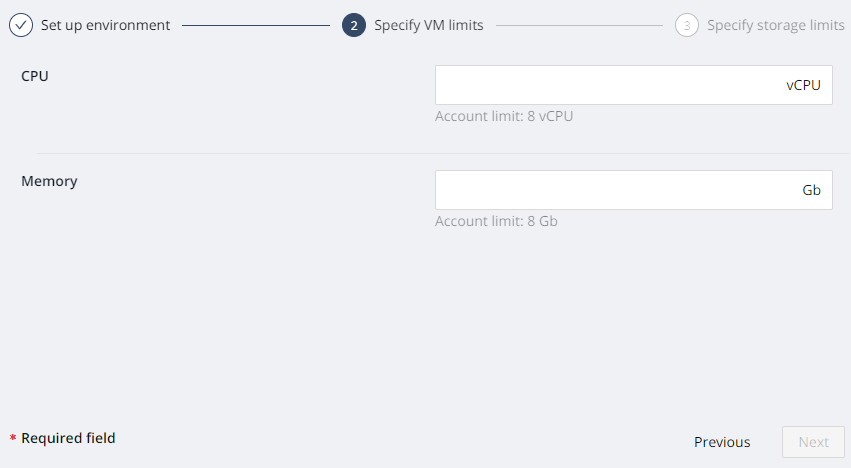
3.2.2. Step 2.Specify VM limits
Set the maximum amounts of computational resources that, in total, can be used by the different applications deployed in the environment.
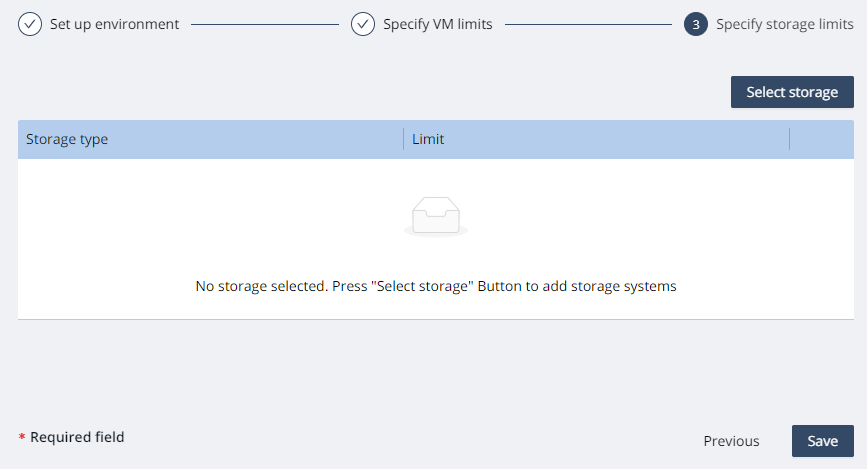
3.2.3. Step 3. Specify storage limits
Set the storage limit for each type of storage available in the environment. Click on the "Select storage" button (top right) to select a storage type and specify its limit. Repeat this operation for each type of storage you wish to make available to the environment. If no limit is specified, only volatile storage is available in the environment.
3.3. Accounts Dashboard
The Accounts Dashboard shows the accounts to which the user has been granted access. It provides a quick and homogeneous visualization of the different accounts regardless of the cloud provider.

On the right is the filter panel from which you can filter the different accounts by tenant or even filter a specific account.
The accounts cards provide useful information for managing and operating the infrastructure quickly:
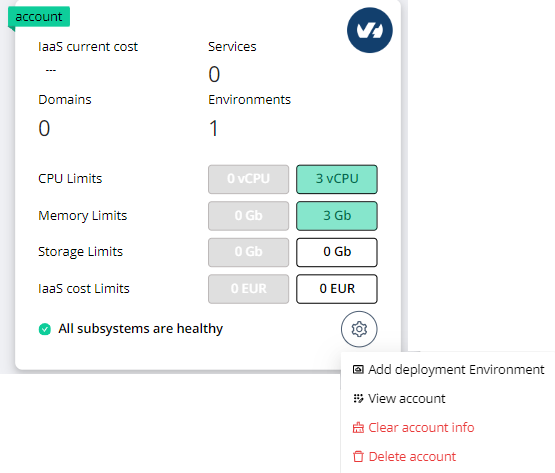
-
IaaS current cost.
-
Services.
-
Domains.
-
Environments.
-
Limits (CPU, Memory, Storage and costs).
-
Healthy.
The account actions button (bottom right) allows you to perform different actions on the account: create an environment, view detailed information, clean services in the environments associated with the account and delete the entire account, including deleting services and environments from the account.
3.4. Environments Dashboard
The Environments Dashboard provides a quick view of the Deployment Environments.
In this dashboard the environments to which the user has been granted deployment permissions are displayed. It provides a quick and homogeneous visualization of the different deployment environments regardless of the cloud provider.
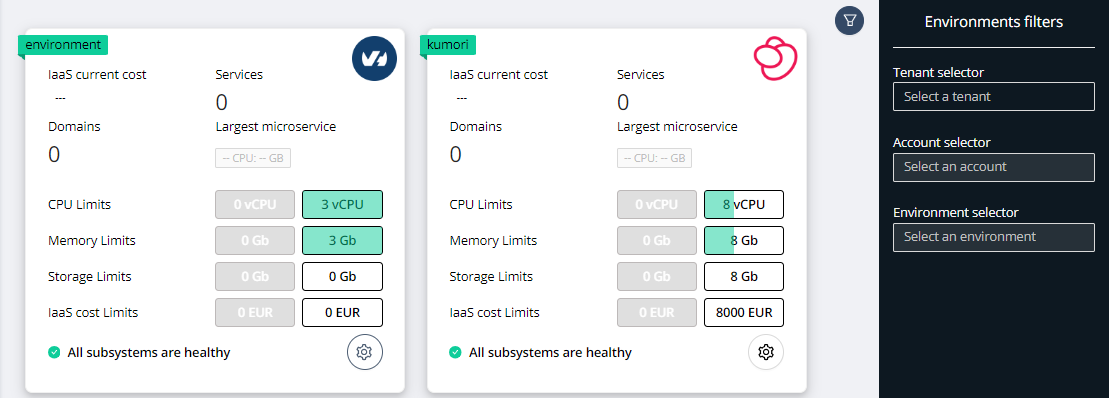
On the right is the filter panel from which you can filter the different environments, by tenant, by account or even filter a specific environment.
The environments cards provide useful information for managing and operating the infrastructure quickly:
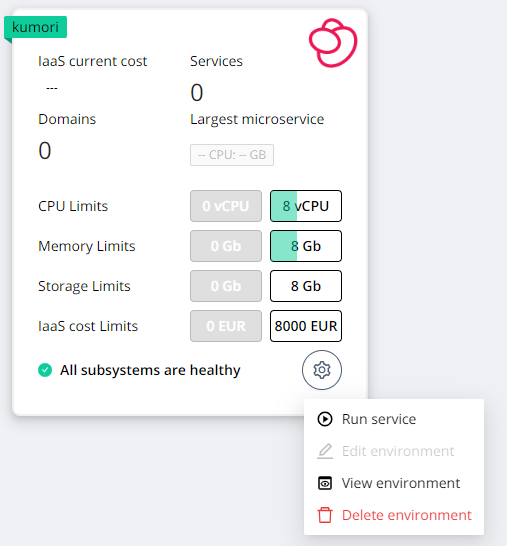
-
IaaS current cost.
-
Services.
-
Domains.
-
Largest microservice.
-
Limits (CPU, Memory, Storage and costs).
-
Healthy.
The environment actions button (bottom right) allows you to perform different actions on the environment: deploy a service (Run Service), view detailed information and delete the entire environment, including the deployed services.
4. Developer
The Developer Dashboard allows to deploy and test software quickly and homogeneously on one of the deployment environments.
The Developers can specify, run, and test their solutions quickly against specific deployment environments set up for their tenants, with zero interaction with devops teams, Axebow takes care of everything needed to perform runs.
The Developer Dashboard is composed by three dashboards:
-
Marketplace Dashboard: Shows the components and services stored in the Artifact Registry of the selected Marketplaces. For any given user, only the public Kumori marketplace, and the marketplaces of the tenants the user belongs to will be available.
-
If no Tenant is selected, the dashboard shows all the components and services stored in the Artifact Registry of all the tenants the user belongs to.
-
-
Runtime Dashboard: Shows the running services deployed in the Environments the user belongs to.
-
If neither Account nor Environment are selected, it shows all deployed services within a tenant.
-
The user can filter deployed services by account/environment.
-
-
Resources Dashboard: Allows to manage resources needed by the applications like domains, secrets, ports, volumes, etc.
4.2. Runtime Dashboard
The Runtime Dashboard allows the developers to monitor and manage the running services easily and homogeneously, showing running services information and a set quick actions to operate the running services.
WIP
5. User
WIP
5.2. Tenants
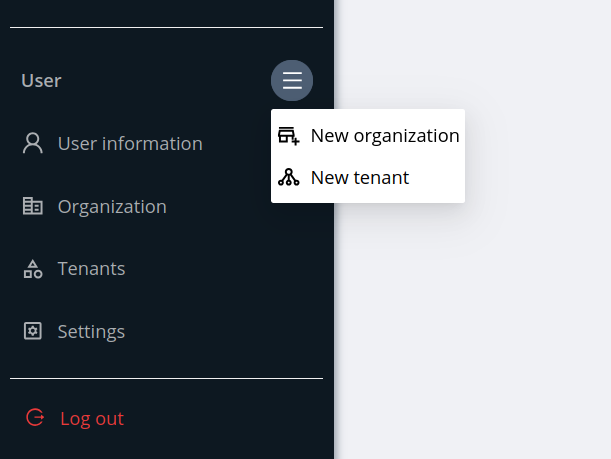
The creation of a tenant starts from the menu option 'New Tenant':
Fill out the form by specifying at least the tenant name (e.g., ‘testenant’ in this example). Optionally, you can specify an NPM repository and a domain if you want the new tenant to have a private Marketplace. If you don’t, you won’t be able to publish Kumori modules on that tenant, but you’ll still be able to use those already available in the public Marketplace. For this test, it’s not necessary to specify the NPM repository.
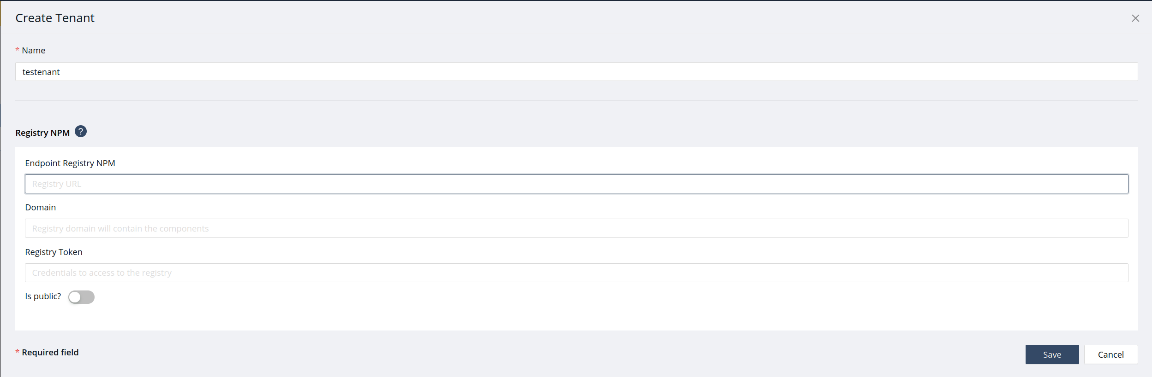
Click Save to create the tenant.

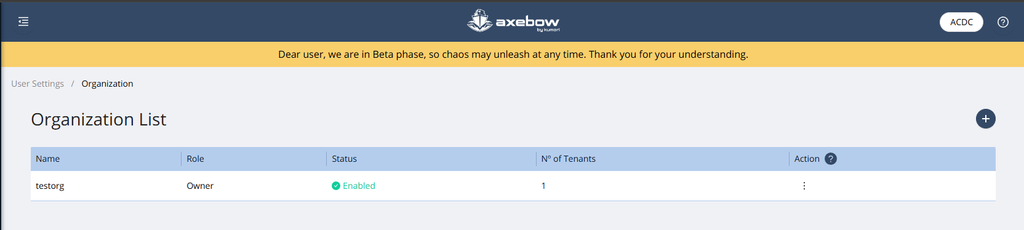
5.3. Organization and Payment Plan
Organization
First create an organization, starting from the New Organization menu:
Fill out the form with sample data since this information is not relevant to the test process:
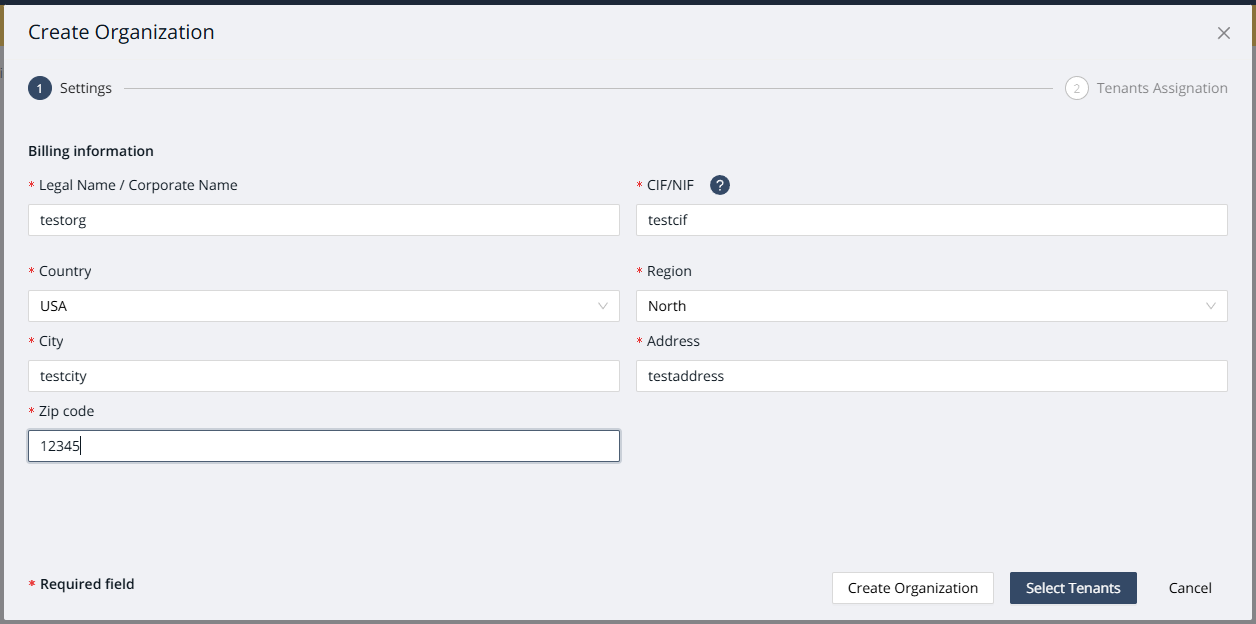
Click the Select Tenants button to proceed to the tenant selection form, where you will choose the tenant created in the previous steps:
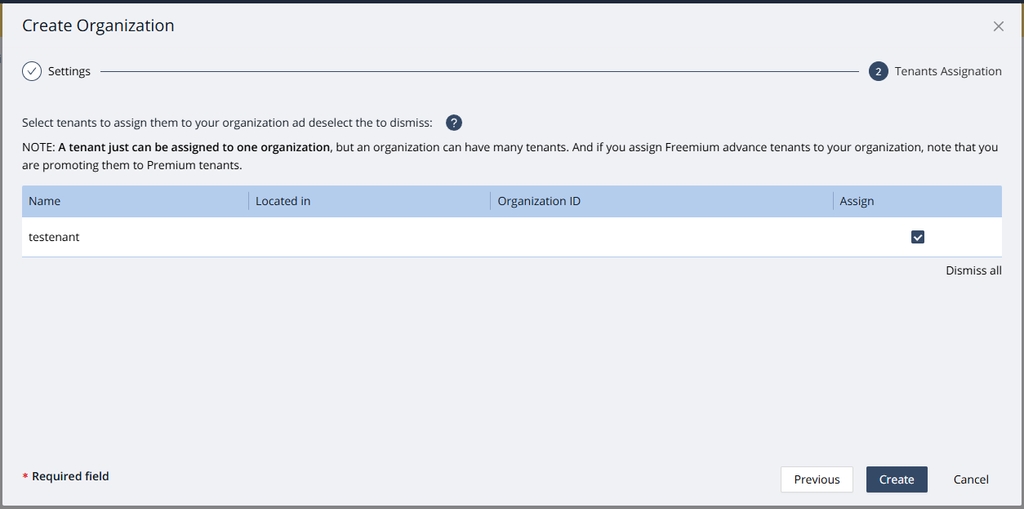
Once the tenant is selected, click the Create button to create the organization. You will then see the organization appear in the list of organizations:
Credit Card
During this period, the service is free of charge.
5.4. Settings
WIP