Deploy a service database
1. Deploy a service database
There are two ways to deploy a database on Axebow
-
Deploy a database service from a Docker image.
-
Run a database component from the Marketplace.
This document will guide you to success deploy a database service from a Docker image.
You can download the source code to build the Mongo DB image used in this guide from this Kumori github repository, project employee-management-app.
Note this process can be used for any application in a docker image.
To start, log in Axebow using your social account, then you will be forwarded to Axebow homepage.
Go to the home page, click Run Service.
1.1. Step 1
Set the repository that contains the docker image, the name and the tag that identifies the image to deploy.
- Registry URL
-
ghcr.io - Image Name[:Tag]
-
kumori-systems/employee-service-application-db:1.0.0
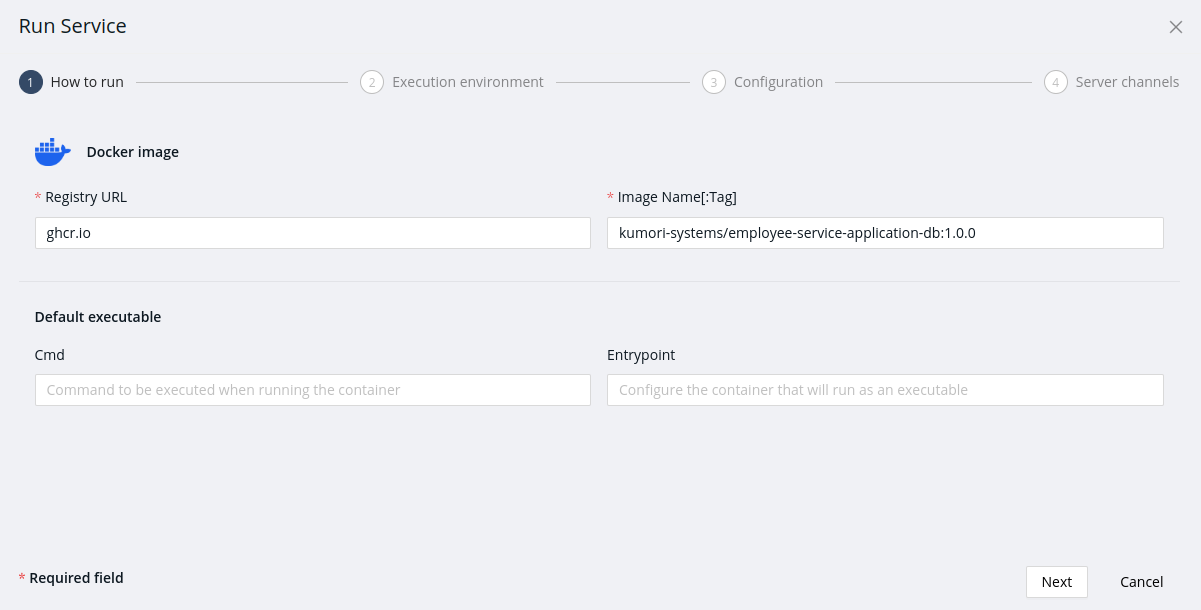
Click on Next.
1.2. Step 2
Select the Freemium Tenant. And set the CPU and memory usage limits to ensure optimal performance. Then put in the service name.
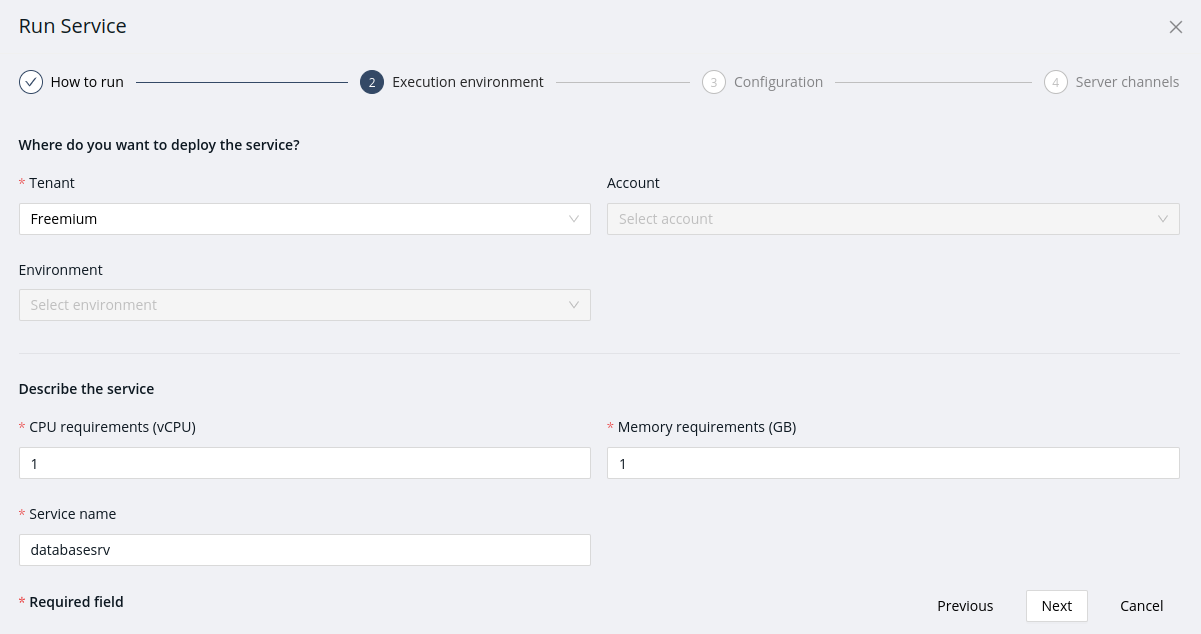
Click on Next.
1.3. Step 3
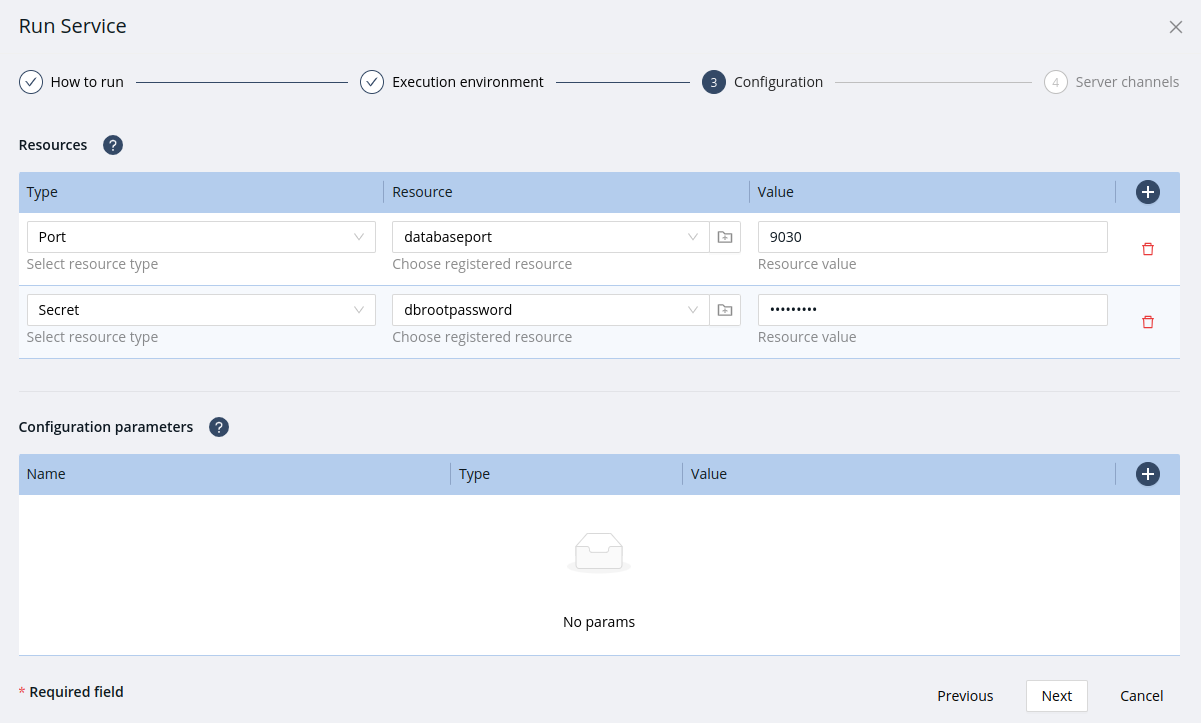
The next step is setting the configuration.
By default, deployed services are private what means they cannot be accessed from the Internet, only other services deployed in the same environment can connect to privete services.
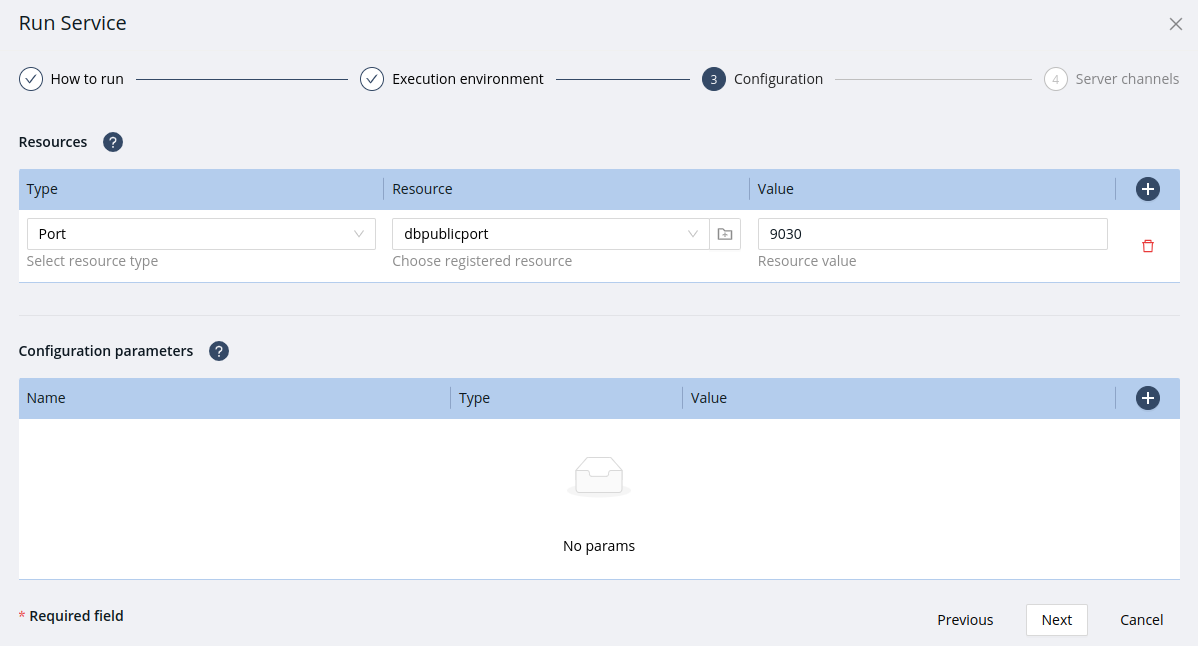
So, for example, to connect a database manager like DBeaver from your local host to the database service (from the Internet), first you must reserve or create a resource port in Axebow. In the Resources section:
-
Click on Choose a resource button. Then set the resource type to Port.
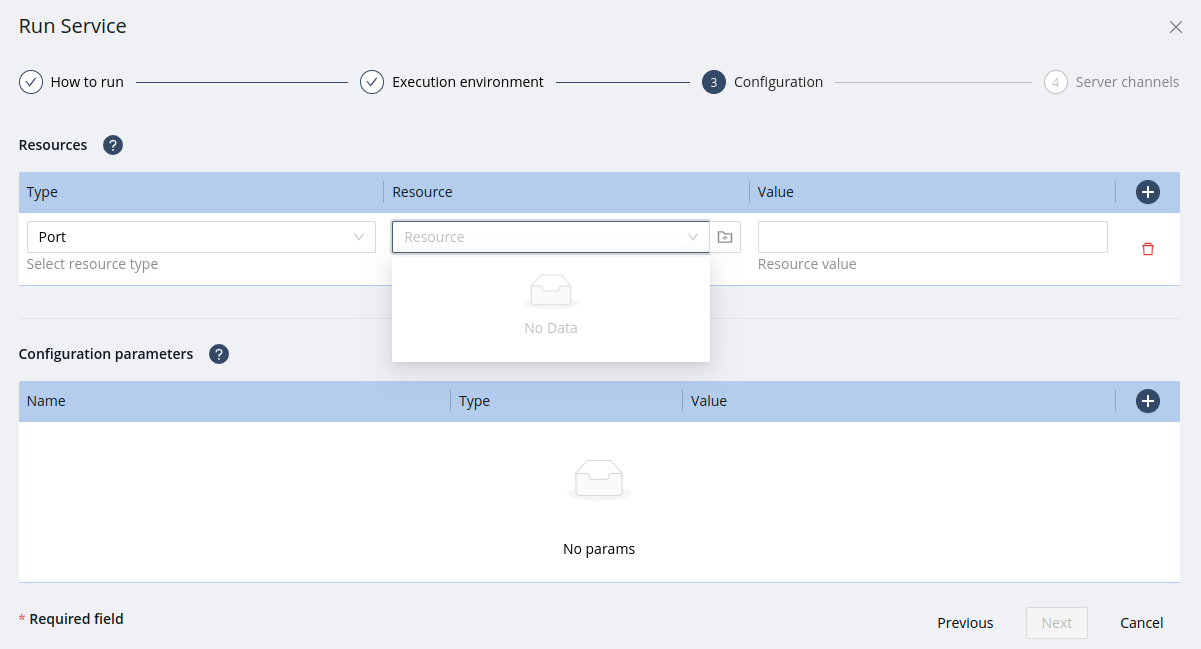
-
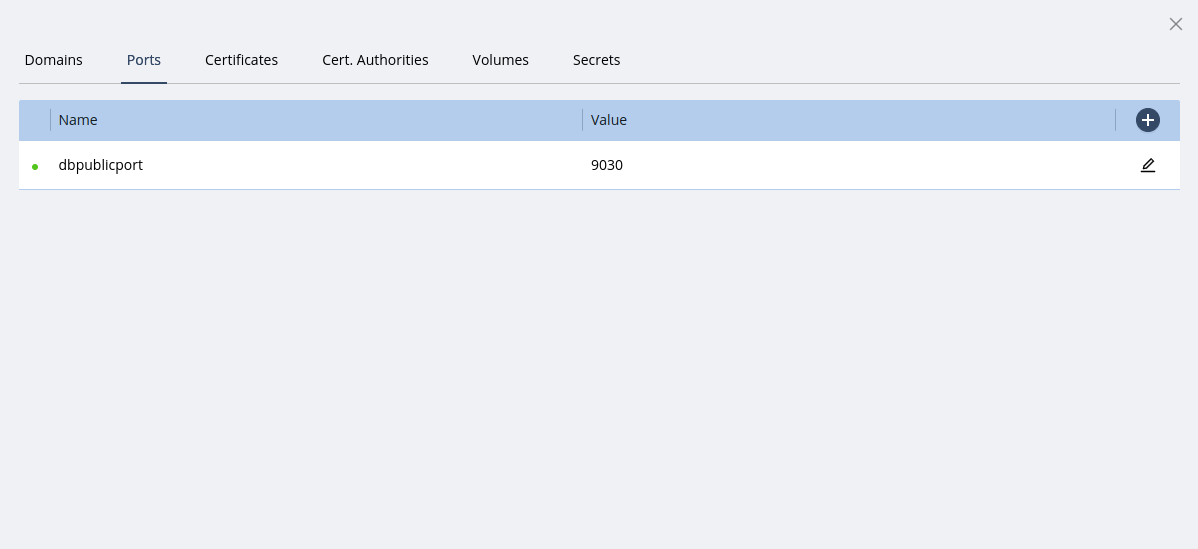
First time, there isn’t any port and the Port selector is empty (as you can see in the previous image), in that case click on create resource.
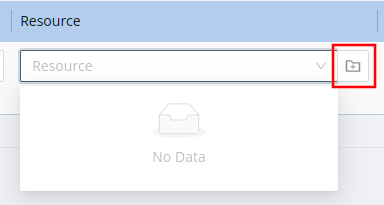
-
Click on "Register a new port" button. Set the port resource name that will identify the port resource inside the tenant. Finally click on close dialog.
-
Then, select the port you created in the previous step.
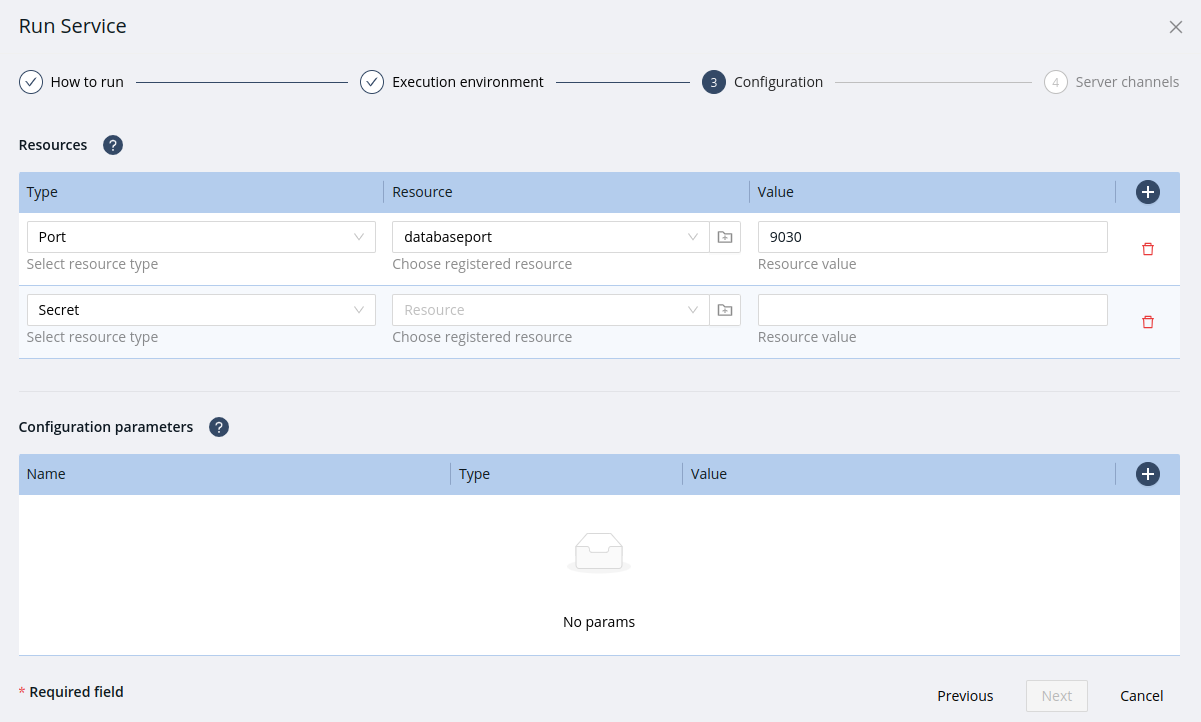
You can set up a root user to manage the database. In this context, it is a best practice to create a Secret resource to store the value of the root user password.
-
Click on Choose a resource button. Then set the resource type to Secret.
-
First time, there isn’t any secret and the Secret selector is empty (as you can see in the previous image), in that case click on create resource.
-
Click on "Register a new secret" button. Set the secret resource name (
dbrootpassword) that will identify the secret resource inside the tenant. Set the database user password as secret value (admin1234). Click on close dialog.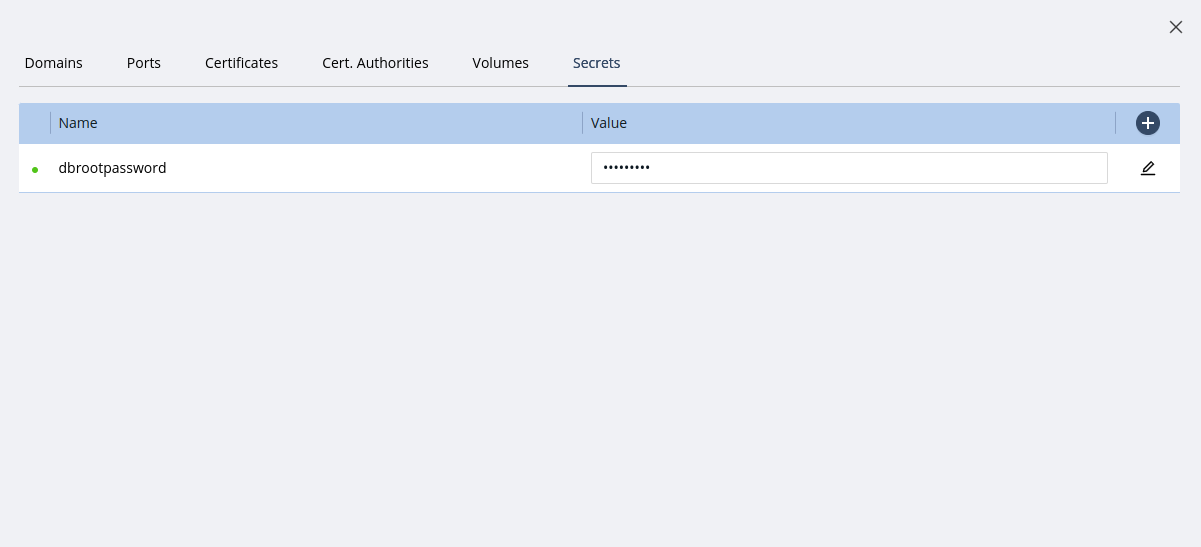
-
Select the secret you created in the previous step.
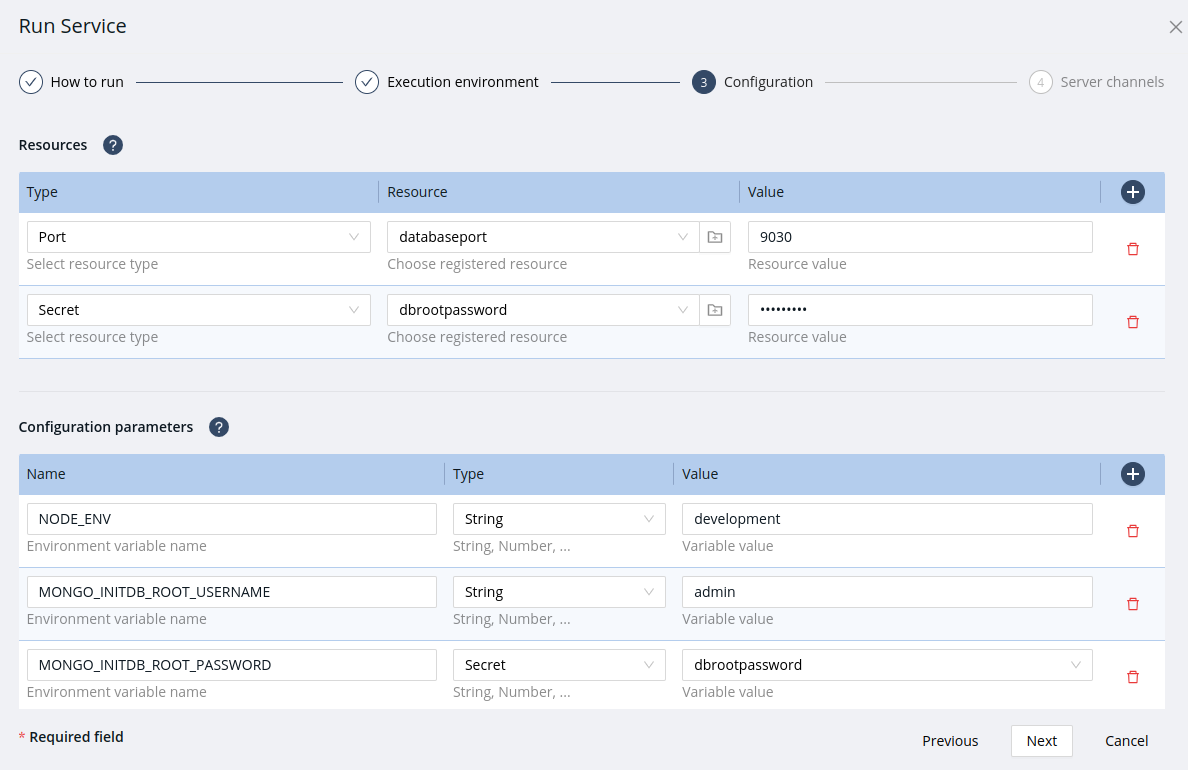
Now, in the Configuration parameters section, create the environment variables the database needs. As said, inspect the Dockerfile to know the database variables any container needs.
For each environment variable, click on New configuration param button. Set the environment variable name. Select the environment variable type. Then, set the environment variable value.
To deploy the Mongo database service of this example, create the following environment variables:
- NODE_ENV
-
Type: String; Value:
development - MONGO_INITDB_ROOT_USERNAME
-
Type: String; Value:
admin - MONGO_INITDB_ROOT_PASSWORD
-
Type: Secret; Value:
dbrootpassword(password valueadmin1234was set at secret registering time).
Click on Next.
1.4. Step 4
To allow incoming connections to the database service, add a Server Channel. Set the channel name. Then the container port (the example database exposes the port 27017) and select TCP protocol.
To enable access from the internet, click on Public and select the port you registered in the Step 3.
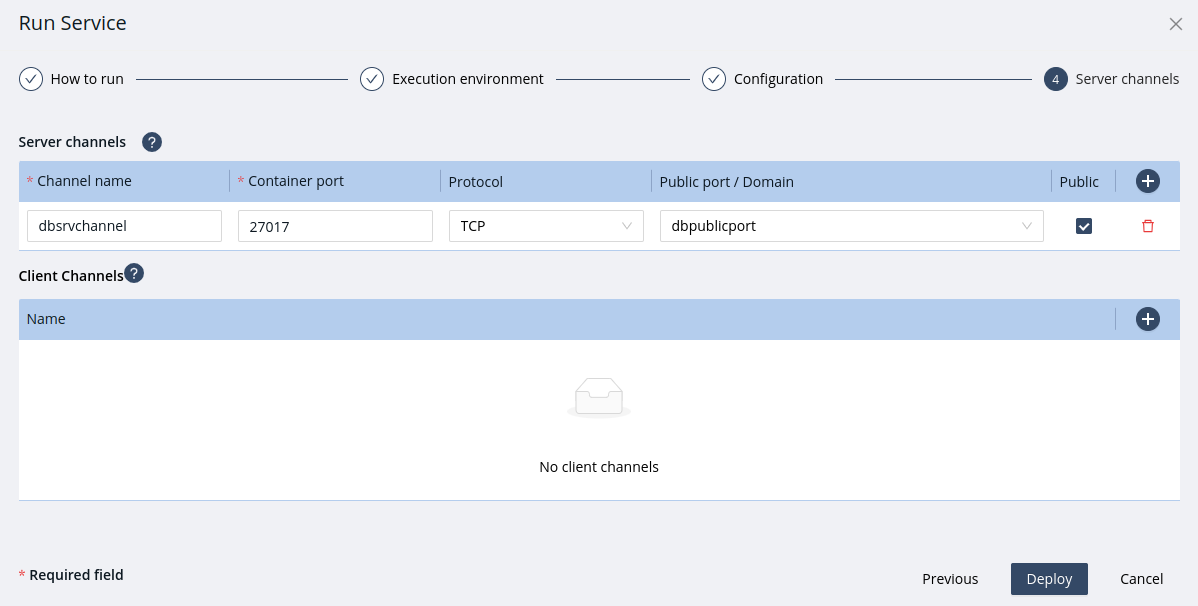
Click Deploy. This process will take a few minutes.
On the Runtime Dashboard you will see the status of the deployment process.
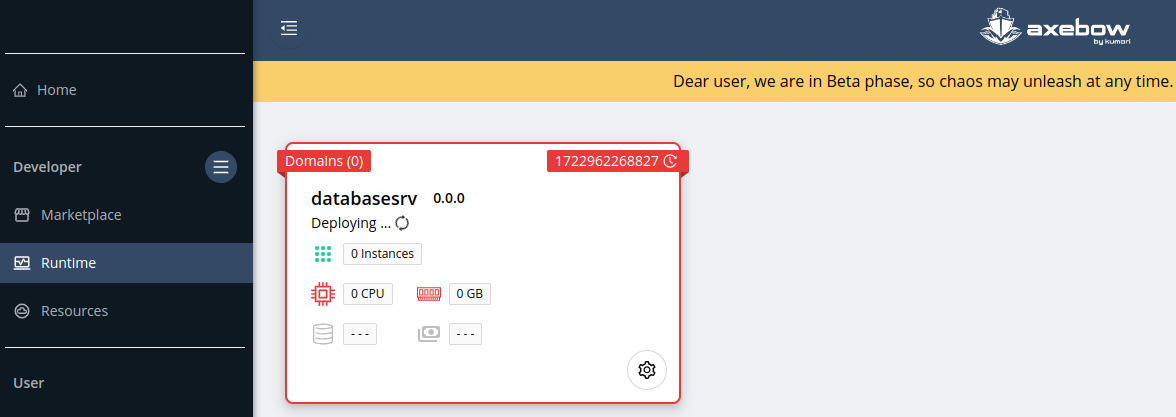
After the deployment is complete, the database service card becomes green.
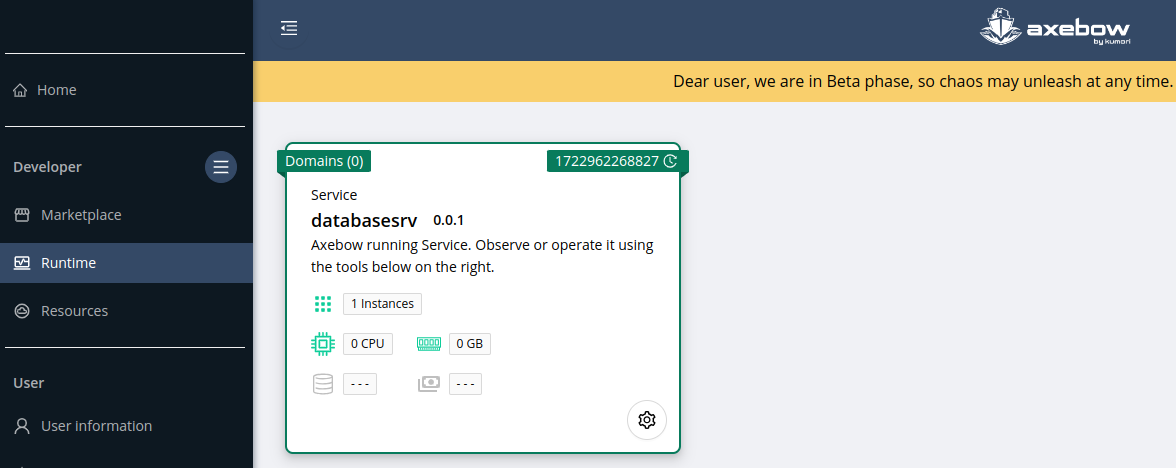
Congratulations, you successfully deployed a database service on Axebow in just a few minutes.