Deploy a service frontend
1. Deploy a service frontend
Deploying a cloud-native web application on Axebow is easy and quick. Typically, cloud-native web applications are composed by: a service frontend, service backend and a service database. In this guide, we’ll see how to deploy the service frontend of a web application for managing an organization employees. If you didn’t neither deploy the database service nor deploy the REST API service, it is recommended you deploy both before to deploy the frontend.
You can download the source code from this Kumori github repository, project employee-management-app.
Note this process can be used for any application in a docker image.
To start, log in Axebow, using your social account, then you will be forwarded to Axebow homepage.
Go to the home page, click Run Service.
1.1. Step 1
Set the repository that contains the docker image, the name and the tag that identifies the image to deploy.
- Registry URL
-
ghcr.io - Image Name[:Tag]
-
kumori-systems/employee-service-application-frontend:1.0.0
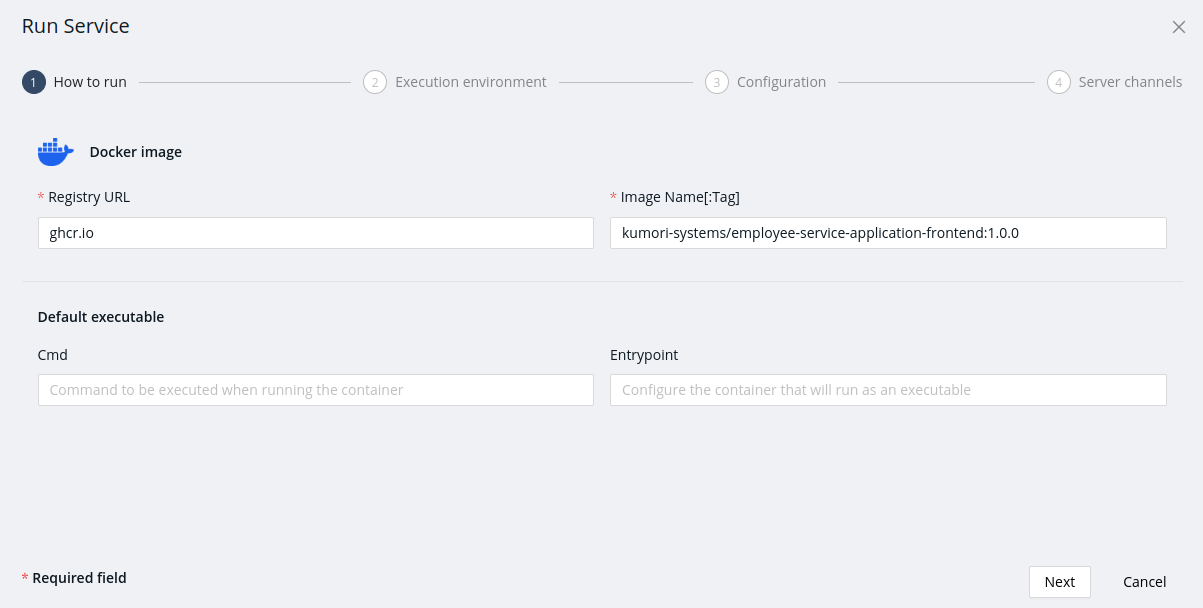
Click on Next.
1.2. Step 2
Select the Freemium Tenant. And set the CPU and memory usage limits to ensure optimal performance. Then put in the service name.

Click on Next.
1.3. Step 3
The next step is setting the configuration.
To navigate to the service web application, the users will introduce an URL in their browers which host name must match with a Domain Name, used to route the browser request to the service web application.
To create the Domain Name:
-
Click add new resource. Then set the resource type to Domain.
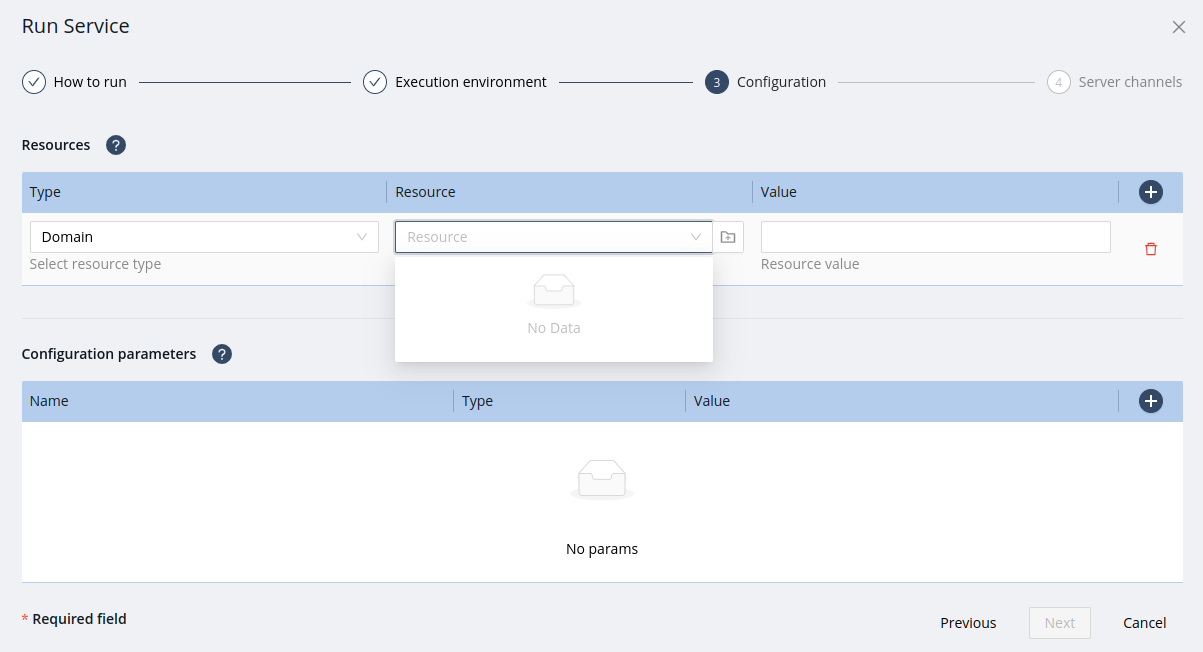
-
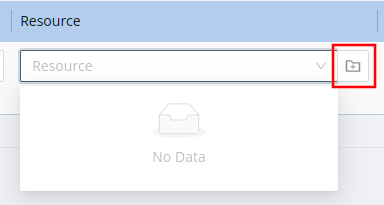
First time, there isn’t any domain and the Domain selector is empty (as you can see in the previous image), in that case click on create resource.
-
Click on "Register a new domain" button. Set the domain resource name that will identify the domain resource inside the tenant. Specify the subdomain name which will be created under the
axebow.clouddomain for agility. Finally click on close dialog.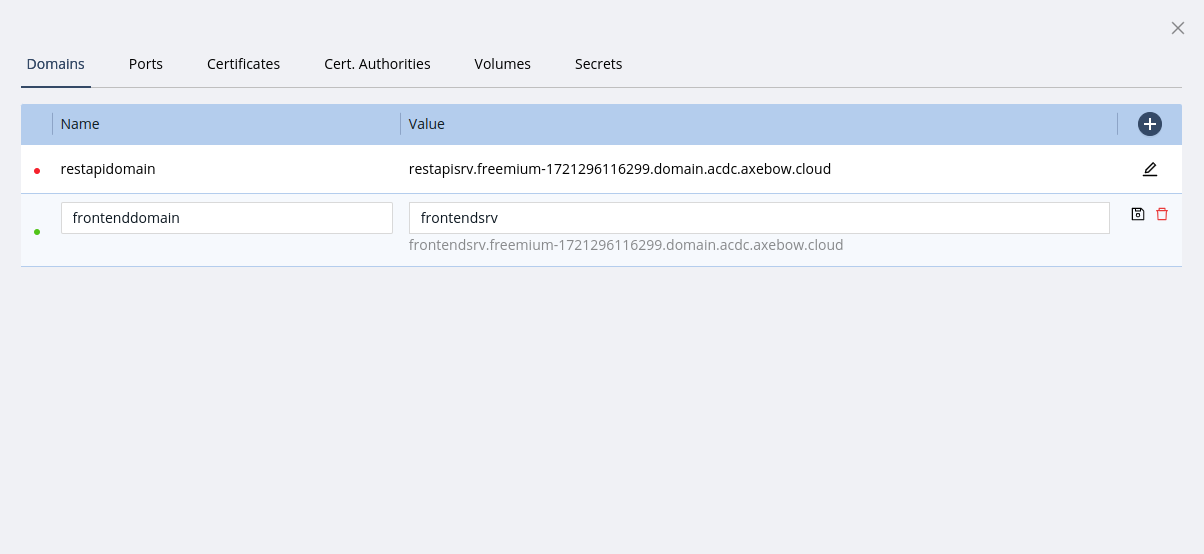
-
Now, select the domain you created in the previous step. Automatically Axebow fills the domain value. Click on Next.
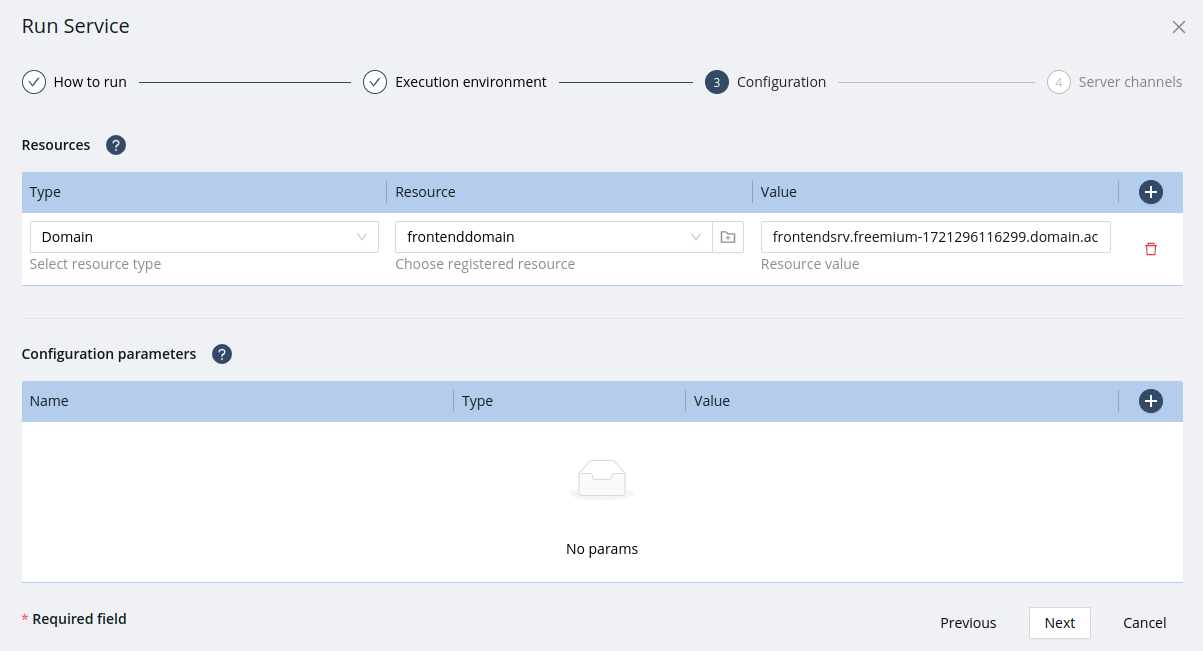
In the Configuration parameters section, create the environment variables the frontend needs. As said, inspect the Dockerfile to know the database variables any container needs.
- BASE_URL
-
Type: String; Value: The domain in which the REST API was deployed, suffixed with
/apiTo copy the REST API URL, go to the Runtime Dashboard and click in the domains list of the REST API card (up on the left). Right click on the domain and press copy link. For example,
https://restapisrv.freemium-1721296116299.domain.acdc.axebow.cloud/api

1.4. Step 4
To allow incoming connections to the service, add a Server Channel. Set the channel name. Check your application dockerfile and set the port the container exposes.
To enable access from the internet, click on Public and select the domain you registered in the Step 3.
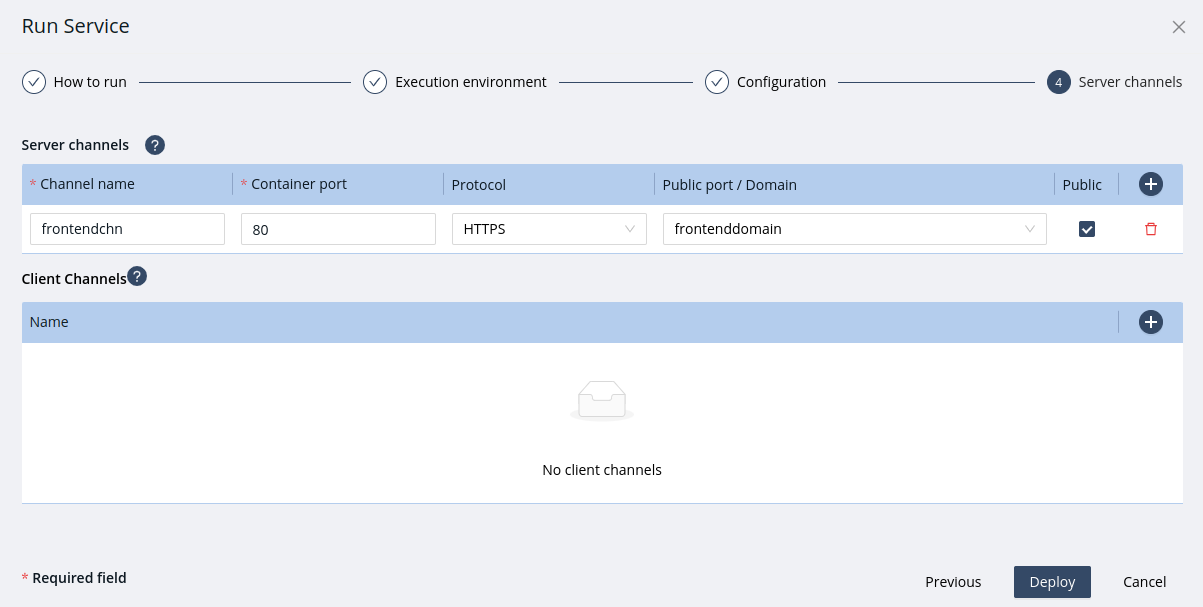
Click Deploy. This process will take a few minutes.
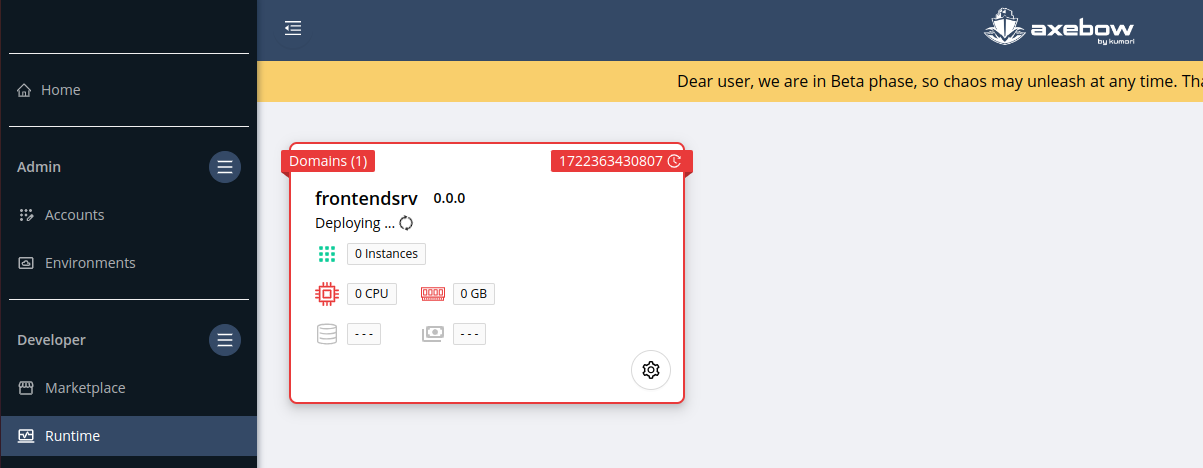
On the Runtime Dashboard you will see the status of the deployment process.
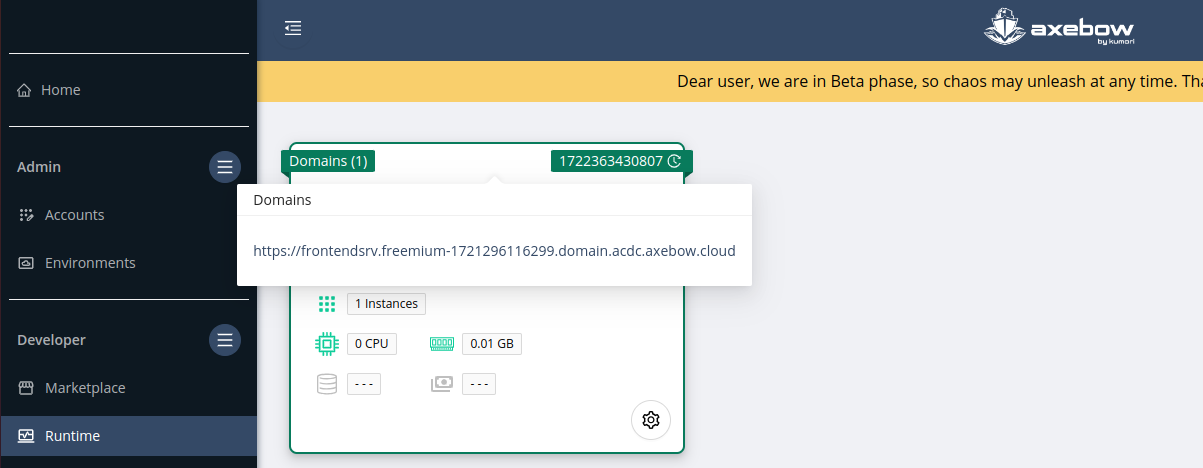
After the deployment is complete, click on the domain name in the domains list (up on the left) to see the application live in the web.
Check it connects to the REST API by log in using the credentials below:
user: admin@gmail.com
pass: admin1234
Congratulations, you successfully deployed an application on Axebow in just a few minutes.